Saturday, May 31, 2008

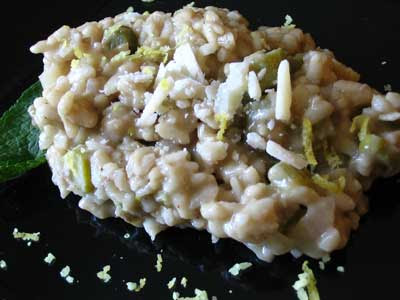
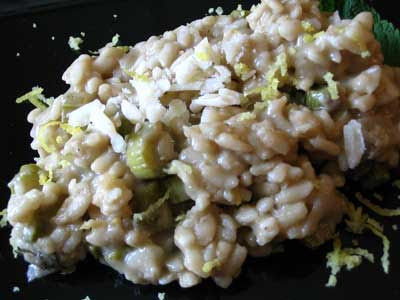
Jamie Oliver's Asparagus, Mint and Lemon Risotto

Holding still another bunch of fresh local asparagus right after making an asparagus and mint frittata the other day, I realized that I was quite taken with the combination of fresh asparagus and mint and decided to google the pair for another idea. And what should show up on the first page but Jamie Oliver's asparagus, mint and lemon risotto … as in asparagus and mint and lemon and risotto! It was but a matter of moments to decide to copy it down, and of only a few hours to tailor the recipe to my needs and begin cooking.

As famous as Jamie Oliver is, I confess to never having made any of his recipes before. Maybe it's that slightly smarmy expression of his that put me off, as though he thinks pretty highly of himself. On the other hand, if he can pull of this glorious combination of flavours so well as in this risotto, perhaps he deserves to wear that face.

As always with the traditional method of cooking risottos, be sure to stir constantly and methodically but not too energetically — you'll wear yourself out and start to cramp in the wrists otherwise.
Asparagus, Mint and Lemon Risotto

1 pound asparagus
4 cups vegetable stock
1 tablespoon olive oil
1 tablespoon butter
1 medium onion, finely chopped
2 celery stalks, finely chopped
1 1/2 cups arborio rice
1/2 cup vermouth or dry white wine
1/2 cup fresh grated Parmesan cheese
juice and zest of 1 lemon
small handful of fresh torn mint leaves
1 teaspoon sea salt, or to taste
fresh ground black pepper


Snap the woody ends off the asparagus. Slice the stalks thinly except leaving the tips whole, and set aside.

Bring the vegetable stock to a good simmer in a small saucepan. In a large saucepan, heat the olive oil and half of the butter at medium-low heat. Add the onion and celery and sauté until soft but not discoloured, about 15 minutes. Toss in the rice and stir to coat the grains. Pour in the vermouth or white wine and cook until the alcohol has evaporated, stirring all the while.

Begin adding the hot stock to the rice one ladleful at a time, stirring and waiting each time until the stock has been fully absorbed before adding the next, until half the stock has been used up. Now toss in the asparagus slices and tips, along with 3/4 cup of the remaining stock. Turn up the heat and bring to a boil, still stirring. As soon as it comes to a boil, turn the heat back down to medium-low and stir until the liquid is absorbed again.

Add the rest of the stock and cook as before, stirring one ladleful at a time until the rice is cooked — it should be soft and creamy, but holding its shape. You may not need all the stock, especially if you prefer your risotto more on the al dente side.

Turn off the heat and stir the rest of the butter, the lemon juice, and most of the zest, mint and Parmesan cheese into the rice. Season with salt and pepper and cover for a minute to let the flavours mingle.

Serve with a scattering of lemon zest, mint leaves and Parmesan cheese. Serves 4 to 6.
This is my submission to Weekend Wokking, a brand new food event focusing on the multiple ways we can transform a single ingredient. Hosted by Wandering Chopsticks, the theme this week is asparagus.

Thursday, May 29, 2008

Indian-Style Split Pea Soup

As the temperature rises in the Northern hemisphere, salads increasingly replace soups on the table. In a way this is a shame, especially as cooler Spring days are heightened by a light bowl of spicy soup and also because there are some cool soups to temper the heat. On the other hand, it's all good.

I suspect my readers residing in the Southern hemisphere will appreciate this simple Yellow Split Pea Soup inspired from Yamuna's Table by Yamuna Devi, an hitherto under-appreciated cookbook that I will have more to say about soon. Convert that I am to Ms. Devi's traditional documentation of Indian cookery, I've just recently begun to explore this chronicle of her expanded culinary experiments.
Indian-Style Yellow Split Pea Soup

For the soup:

3/4 cup of yellow split peas (I used a mixture of split peas and toor dal)
2 tablespoons of basmati rice
7 cups of water or vegetable stock
1 tablespoon of grated fresh ginger
generous handful of hot peppers (I used a mixture of serrano, jalapeno and green chilies)
1 teaspoon of ground turmeric
2 cups of chopped tomatoes
1 carrot, sliced
sea salt to taste
freshly cracked black pepper

For the toasted spice oil:

1 teaspoon of brown mustard seeds
1 teaspoon of cumin seeds
1 tablespoon of sesame oil
3 tablespoons of chopped parsley for garnishing


Combine all of the soup ingredients in a large pot, except the salt and pepper. Bring to a boil, reduce the heat to medium low, partially cover and simmer for 1 - 1 1/2 hours or until the split peas begin to break apart. Puree the soup in a blender or with a hand blender. Season with salt and pepper.

Put the mustard seeds in a small saucepan over medium heat and cover. Shake the pan occasionally. When the seeds begin to pop, add the cumin seeds and oil. Stir for a few seconds and then pour the oil seed mixture into the soup. Cover the soup and let sit for a few minutes. Stir, ladle into bowls and garnish with a bit of the chopped parsley.

Yields 6 servings.

Rolled flank steak

Discovering new food blogs is always an interesting thing. I love going through their archives, checking texts, recipes and photos, getting to know a little about that foodie – who will probably become a blogger friend.One of my latest “findings” is packed with beautiful photos and delicious recipes, and the girl behind it is a huge Martha fan, like me. I’m talking about Mimi.She is hosting an

Wednesday, May 28, 2008

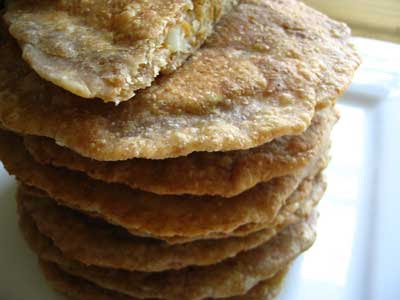
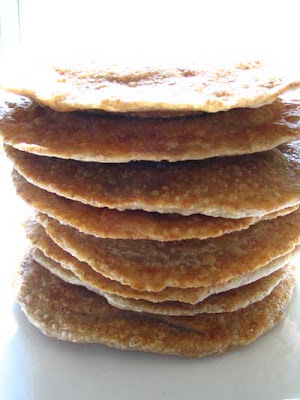
Whole Meal Biscuits

These biscuits could just as easily be called crackers I suppose, depending on your understanding of the terminology. I am immediately reminded of Johanna's informative post regarding the scone / biscuit controversy. Do refer to the picture for guidance here. The original recipe comes from Fresh Food Fast by Peter Berley. He suggests you serve these crisp little crackers with grapes (do choose red) and some sharp spreadable cheese, such as Brie or blue. I purchased some Brie beforehand, but ended up serving them with my Goat Cheese Olive Balls instead. Let the cheese warm to room temperature for easy spreading and don't forget that full bodied glass of red wine to go along with the whole delightful experience.

As for the Brie, I look forward to transforming it into a new culinary treat. If I wasn't such a hermit, and actually entertained, I just might be popular.

Whole Meal Biscuits, served with grapes and goat cheese

1 cup of rolled oats
3/4 cup of whole wheat pastry flour
1 tablespoon of brown sugar, preferably Demerara (I used Rapadura)
1/2 teaspoon of baking soda
1/2 teaspoon of salt
1/8 teaspoon of freshly cracked black pepper
5 tablespoons of cold unsalted butter, cut into chunks
1/3 cup of whole-milk yogurt (I used buttermilk)


Line a baking sheet with parchment paper.

In a food processor, process the oats, flour, sugar, baking soda, salt and pepper to form a fine meal. Drop the butter in and pulse until the butter is reduced to small bits. Add the yogurt (or buttermilk) and pulse a few more times.

Transfer the dough to a lightly floured board and roll out until the dough is approximately 1/8 inch thick. Cut into roughly 2 inch rounds and transfer to the baking sheet. Re-roll left over dough and repeat.

Prick each biscuit with the prongs of a fork. Bake in a preheated 400 degree oven for 12 - 15 minutes, or until the biscuits are lightly browned. Cool for a short while on a wire rack before serving.

Streuselkuchen


Now you’ll see the shallow side of yours truly. :)

How can one NOT bake something called streuselkuchen?? I mean, isn’t it fun to say? So it must be fun to eat – that’s my theory. The same one I apply to snickerdoodles.

Only half of the German yeast dough is used in the recipe, so you can either cut it in half or use it again on the next day (see note). I made blackberry jam pull aparts with

Tuesday, May 27, 2008

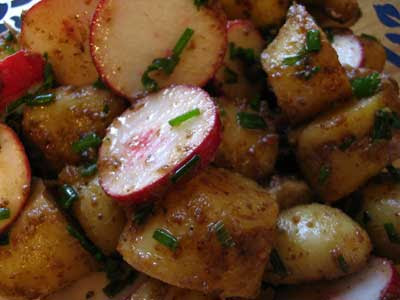
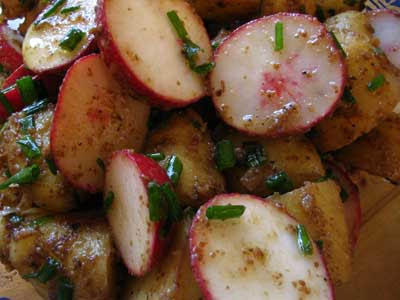
Potato Radish Salad

The key to an excellent potato and vinaigrette salad, as I've learned, is to toss the dressing with the potatoes just after cooking to let the flavours penetrate while they're still warm. The result is a bite of potato that you can savour throughout, without a plain and dull starchy interior.

And what makes this easy and vibrant potato radish salad really tick is a potent mustard-based vinaigrette that penetrates the potato as well as the palette. Use the most pungent coarse grain mustard you can find to give this salad a kick that will make your guests ignore whatever else is on the menu. I made the dressing with an odd but unforgettable Balsamic and Cracked Black Pepper Mustard from an Ontario company called Mrs. McGarrigle's that a friend of mine found in a mustard shop in Ottawa!

This salad lasted only minutes when served, but part of the reason for that was perhaps my nibbling on the dressed potatoes before they were tossed with the last ingredients and put on the table — that's just how good they were.
Potato radish salad

Salad:

1 pound new or fingerling potatoes, with skins
1 bunch radishes, thinly sliced
2 tablespoons fresh chives, chopped


Dressing:

3 tablespoons olive oil
1 tablespoon sesame oil
2 tablespoons red wine vinegar
2 teaspoons coarse grain mustard
1 teaspoon honey, softened
1/2 teaspoon sea salt
fresh ground black pepper to taste


Boil the potatoes until just tender, only 5 to 10 minutes depending on the size of the potatoes. Drain and cut any larger than mouthful potatoes into bite-sized chunks. Return to the still hot saucepan.

Whisk together the dressing ingredients and mix thoroughly with the potatoes. Let stand at room temperature for at least one hour, tossing periodically to distribute the vinaigrette while the potatoes are cooling.

Mix in the radishes and chives and serve. Chill if desired. Serves 4.
This is my submission to Weekend Herb Blogging, hosted this week by Wandering Chopsticks.

Outrageous chocolate cookies

Kindness. Something we see a lot around food blogs, but we hardly find elsewhere.I needed to install the wireless connection at home and since I know nothing about computers I called my brother for help. He stopped by with Paulo, a techie friend of his. In minutes I was using my new laptop. Great.What could I make as a thank you gift? Something sweet, of course. Cookies, then. Scandalously full

Monday, May 26, 2008

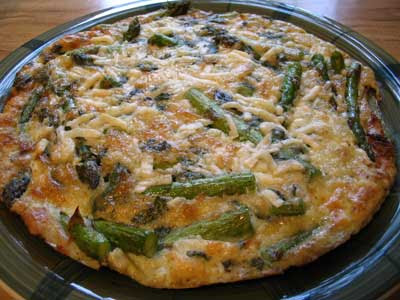
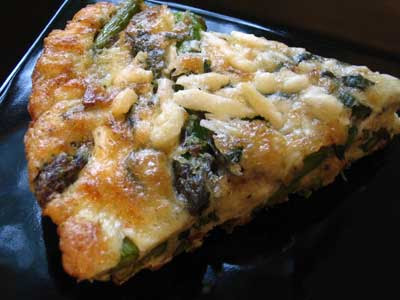
Asparagus and Mint Frittata

There is nothing like the early asparagus season to herald the coming of outdoor weather and to grace the plates of cooks in southwestern Ontario with this most perfect and luxurious of vegetables. Once the sweet and tender local products arrive on the market, I'm never without a bunch or two.

Like all of the classic flavours, asparagus is best paired in the simplest fashion with other of the great classic foods like eggs, cheese, fresh herbs, butter, lemon, pepper or salt … and the fewer the better. In fact, strip away everything but a bit of butter or lemon and a dash of sea salt and you've got the most rewarding of dishes. I'd go so far as to say that asparagus, especially when fresh and local, gives perhaps its finest performance when served almost completely au naturel and with just a tiny little sprinkle of sea salt.

Still, when Scott of Real Epicurean challenged food bloggers to come up with a seasonal recipe for In the Bag featuring asparagus as well as eggs and Parmesan cheese, I could see absolutely nothing wrong with that at all! In response, I've turned to my old stand-by, the pan-fried then oven-broiled frittata. Taking a cue from a recipe in Marlena de Blasi's fascinating Taste of Southern Italy I added some dry white wine and plenty of fresh mint to the egg batter this time, but substituted my own asparagus preparation and frittata cooking methods. Despite the amount of herb, the mint added just a delicate but refreshing bouquet that perfectly complemented the asparagus without overwhelming it. If you like asparagus, eggs and Parmesan cheese — and who doesn't? — I think you'll be delighted with this entry.
Asparagus, Parmesan and Mint Frittata

1/4 cup olive oil
1 pound fresh asparagus, ends snapped off
1 clove garlic, crushed or minced
6 large eggs
2/3 cup fresh grated Parmesan
1/2 cup fresh mint leaves, torn except for a few for garnish
1 tablespoon dry white wine
1/2 teaspoon sea salt
fresh ground black pepper


Cut the tips off the asparagus and set aside. Chop the rest of the asparagus stems into 2-inch pieces.

Beat the eggs together in a bowl with 1/2 cup of the Parmesan, the torn mint leaves, the dry white wine, salt, and generous grindings of black pepper.

Heat the olive oil over just higher than medium heat in a 9- or 10-inch oven-safe frying pan. When the oil is hot, add the asparagus stem pieces and stir-fry for 2 minutes, then add the tips and continue stirring for another 2 minutes. Toss in the garlic and sauté for just 30 seconds to soften it up without taking on colour.

Pour in the egg mixture and tilt the pan to distribute. Lower the heat to just less than medium heat and cook the frittata, lifting its edges now and then with a rubber spatula to let uncooked egg spill beneath. Now preheat the oven's broiler.

When the bottom and sides of the frittata are nicely crusted and brown, about 8-10 minutes, sprinkle on the remaining Parmesan cheese and transfer the pan to beneath the broiler. Cook the top until the cheese and eggs are spotted with brown.

Remove from the oven and immediately slide the frittata onto a plate. Garnish with the remaining untorn mint leaves and serve in wedges either hot, warm or cold.

Sunday, May 25, 2008

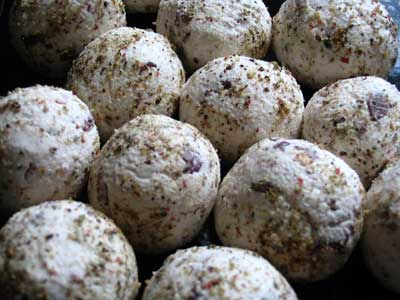
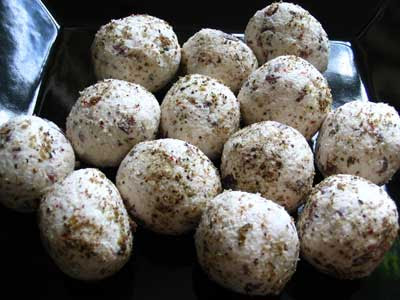
Goat Cheese Olive Balls

It's not as if I need an excuse to spend time in the kitchen, but a little inspiration from others is always welcome. Mansi is hosting the next Monthly Mingle, an event started by Meeta of What's For Lunch Honey. Mansi is inviting readers to submit bite sized Appetizers & Hors'Doeuvres. I immediately thought of goat cheese.
Goat Cheese Olive Balls

250 grams of soft goat cheese
1/4 cup of finely chopped kalamata olives
1/2 teaspoon of red pepper flakes
1 teaspooon of very finely chopped fresh rosemary
1/2 teaspoon of sea salt
1/4 teaspoon of freshly cracked black pepper

2 teaspoons of freshly cracked mixed peppercorns for coating


In a small bowl, mash together the goat cheese, olives, red pepper flakes, rosemary, salt and black pepper. Roll into 1 inch balls. Sprinkle with a bit of the mixed peppercorns, rolling the ball around on the palm of your hand to coat. Chill for 30 minutes. Serve with thin crackers or simply consume as is.

Makes 16 - 20 spicy balls.

Saturday, May 24, 2008

Chocolate discs with orange cream and marinated oranges

Before I tell you about this luscious dessert, I want to thank you all for your support regarding my last post. I don’t even know how you are able to walk around with your hearts, since they are the size of a house.I haven’t taken part in Sugar High Friday for quite a while now – which is a total shame, since I love participating in food events. Just need to get organized and watch the deadlines

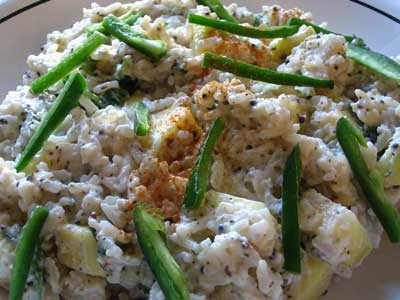
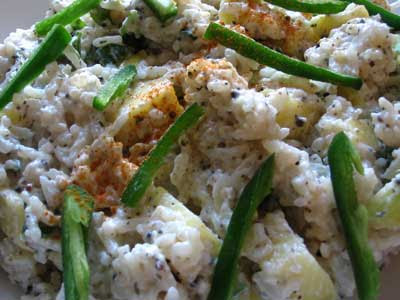
Chilled Mango and Yogurt Rice

Mango rice dishes in countless variations are everywhere to be found on the tables of South Indian households. This version is my favourite (so far), stirred together with plenty of yogurt and served chilled to go with any hot spicy meal or as a light outdoor lunch with fresh vegetables. Choose mangoes that are just ripe and not too soft.
Chilled mango and yogurt rice

Rice:

3 cups water
1 1/2 cups basmati rice
2 cups plain whole-fat yogurt
1 large green mango, peeled and diced (about 1 1/2 cups)
2 tablespoons fresh cilantro, chopped
2 teaspoons dried mint
1 teaspoon sea salt
1 1/2 teaspoons fresh ground black pepper, or more to taste
1/4 teaspoon cayenne


Dressing:

1 tablespoon ghee or olive oil
2 teaspoons brown mustard seeds
1-2 inch piece fresh ginger, minced


Garnish:

2 jalapeño peppers, seeded and cut into fine 1-inch strips
cayenne


Bring the water to a boil in a medium saucepan. Meanwhile, rinse the rice under cold running water. Toss in the rice when the pan is boiling, reduce the heat to low, and cover with a tight-fitting lid. Cook for exactly 15 minutes without disturbing, then remove from heat and fluff with a fork. Set aside to cool for at least 20 minutes.

Combine the rice in a large serving bowl with the yogurt, mango, cilantro, mint, salt, pepper and cayenne and gently mix to avoid breaking the grains. Taste for seasoning and add more salt, pepper or cayenne as desired.

To make the dressing, heat the ghee or olive oil in a small frying pan over medium heat. When hot, toss in the mustard seeds and ginger and fry until the mustard seeds turn gray and start to splutter. Pour over the rice and fold to mix. Chill.

Serve cold or warmed up slightly in room temperature, sprinkled with cayenne and strips of jalapeño. Serves 8.

Friday, May 23, 2008

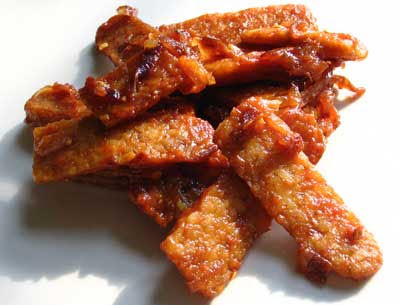
Oseng Oseng Tempe

Oseng Oseng Tempe
Like pasta for most people, tempeh is becoming for me one of those ready-to-cook ingredients that I like to keep on hand just for those occasions when I have nothing particular planned and need to throw together a fast and easy meal. But while it shares with pasta a versatility that can pair it with all kinds of sauces and seasonings, the traditional Indonesian fermented soybean product has the advantage of being rich in proteins.

Oseng Oseng Tempe
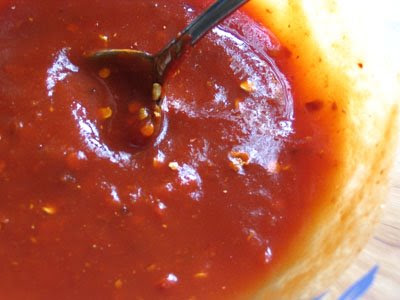
These crispy but chewy nutty little tempeh wafers in a tangy tomato glaze — an Indonesian recipe that comes from my valued copy of Celia Brooks-Brown's World Vegetarian Classics — take hardly any more time and effort than making a pot of macaroni and cheese, and are irresistibly delicious. Serve with some carbohydrates in the form of rice and some vegetables and you have a simple, tasty and complete meal.

Oseng Oseng Tempe
Of course, as I like to remind my readers, the benefits of tempeh or any soy product can only be realized by finding brands that properly ferment the otherwise harmful soybeans — one of the most indigestible of all legumes because of their very high content of enzyme inhibitors and phytic acids which actually block the absorption of essential minerals and cause potential intestinal problems. Unfortunately, this rules out almost all tofu and soy milk products — in Western countries, these are almost universally manufactured through modern non-fermentation production methods that remove only some of the inhibitors and hardly any of the phytates, and denature the very proteins that are supposed to be of benefit in the first place. Tempeh, however, is more often than not produced through fermentation, but buyers should also look for a brand that properly inoculates the soy with Rhizopus culture and that is neither pasteurized nor pre-cooked. For Canadian readers, the tempeh from the Noble Bean is an excellent product.


Oseng Oseng TempeOseng Oseng Tempe
Recipe by
From World Vegetarian Classics: Over 220 Essential International Recipes for the Modern Kitchen
Cuisine: Southeast Asian
Published on May 23, 2008

Chewy and nutty tempeh fried until crispy and coated with a tangy and spicy tomato glaze — an extraordinary and delicious simple light lunch or side dish

Print this recipePrint this recipe
Ingredients:
  • 1/4 cup sesame oil or more
  • 12 oz tempeh, cut into narrow 2-inch strips
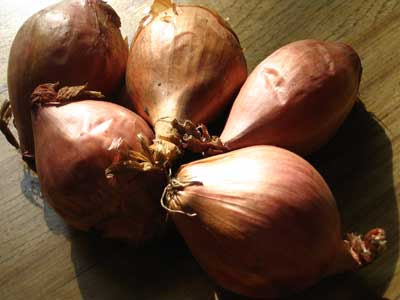
  • 6 shallots, sliced
  • 1 1/2 tablespoons tomato paste
  • 3 teaspoons tamari
  • 1 teaspoon dried red chili flakes
  • 1/2 teaspoon brown sugar
  • juice of 1 lime
Instructions:
  • Heat the sesame oil in a large wok or saucepan over medium-high heat. Add more sesame oil as necessary to raise the level to at least 1 inch. As soon as the oil is hot but not smoking, toss in the tempeh slices and sauté until a light golden color on all sides, about 10 minutes. Add the shallots and continue to fry, stirring frequently, for another 10 minutes or until both the tempeh and shallots are brown and crispy. Remove with a slotted spoon and drain on paper towel.

  • Meanwhile, whisk together the remaining ingredients in a small bowl. Place the tempeh and shallots in another bowl, and mix in the sauce to coat. Serve warm.

Makes 4 servings

Wednesday, May 21, 2008

Cheese Wafers

The lovely Zlamushka has cooked up an idea for a new food event to encourage us to focus on some of those recipes we mean to try. Tried and tested features a different food blog each month, the challenge being to cook something from the archives of the chosen source. This month, we are invited to explore Cynthia's choice creations.

Even after narrowing my focus to Cynthia's vegetarian friendly recipes, I had a hard time deciding what to make. These Cheese Wafers I could not resist. A big thanks to Cynthia for promptly providing the recipe, along with helpful hints. It is absolutely essential that the cheese and butter are at room temperature. I made these on an unexpected afternoon off and in my haste, did not follow the instructions to a tee, which I should have in this instance. The result was a magnificent treat, but the mixture was a bit more crumbly than it should have been because my ingredients were somewhat cool. I've adapted the recipe ever so slightly to accommodate my kitchen.
Cheddar Cheese Wafers

1 cup of finely grated extra old cheddar cheese
1/2 cup of unsalted butter, softened
1 cup of unbleached white flour
1/2 teaspoon of sea salt
1/2 - 1 teaspoon of cayenne


In a medium bowl, mash together all of the ingredients with a fork until well blended.

Cynthia suggests you transfer the mixture to a pastry bag and pipe directly unto an ungreased baking sheet, roughly 3 - 4 inches in length. You can then lightly press the dough with a fork or leave as is.

Alternately, you can shape the dough into small balls or logs and flatten them.

Bake in a preheated 400 degree oven for roughly 12 minutes, or until lightly browned. Cool on a wire rack.

Makes 12 - 14.

No Croutons Required - the roundup

May's edition of No Croutons Required is now available for viewing. It's a tough choice, I know, but please check out the entries and vote for your favorite cheese salad. The winner will be announced at the end of the month, along with the theme for June. I will be hosting this time around.

Tuesday, May 20, 2008

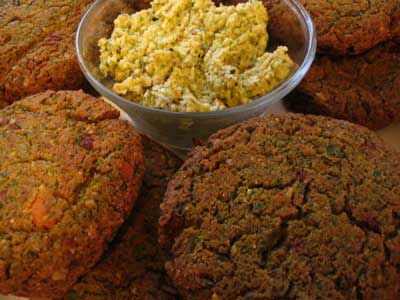
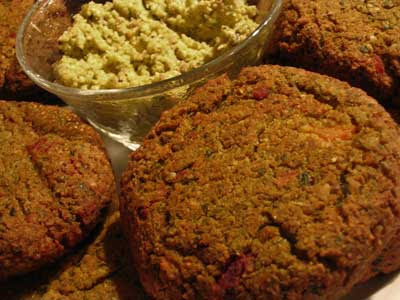
Baked Vegetable Cutlets

Lord Krishna's Cuisine by Yamuna Devi was my earliest introduction to Indian cooking. I received it as a gift shortly after becoming a vegetarian and credit it with improving my eating habits and educating me about the treasures of the Indian cooking tradition. For the first few years, I mostly stuck to the rice and Dal chapters, but all that has changed since I have become more adventurous in the kitchen. Honestly, it's like a book you never want to end. Thankfully, it contains over 500 authentic recipes somewhat adapted for modern day cooks. The possibilities are endless indeed.

A few months ago, I was flipping through the Light Meals and Savories chapter and immediately inserted a post-it-note next to her recipe for Mixed Vegetable Cutlets. I finally had an opportunity to try these recently. Ms. Devi instructs the cook to shallow fry the cutlets, but I was a bit nervous that the mixture would fall apart. The dough was rather blob like, though I had not chilled it yet. I was also tired of being in the kitchen on that particular afternoon. The result was an improvised version including bread crumbs that I baked instead. Overall, a great success.

Serve with a sauce or chutney, such as Toasted Fresh Coconut and Tomato Chutney for a very satisfying meal.
Baked Mixed Vegetable Cutlets (Sabji Tikki)

1 cup of roughly chopped cauliflower flowerets
1 cup of peeled potatoes, diced
1 cup of fresh or frozen peas (defrosted)
1 cup of green beans, chopped
1 cup of carrots, diced
1 small beet, diced
1 stalk of celery, chopped

3 hot green chilies, chopped
1 cup of cooked chickpeas
200 grams of paneer cheese, chopped into cubes
3 tablespoons of chopped cashews
3 tablespoons of chopped almonds
3 tablespoons of sunflower seeds
1 - 2 teaspoons of salt
freshly cracked black pepper
1 teaspoon of turmeric
1 teaspoons of coriander
1 teaspoon of cumin
1/2 - 1 teaspoon of cayenne pepper
1 teaspoon of garam masala
3 tablespoons of chopped fresh parsley
3 tablespoons of chopped fresh coriander
1/2 cup - 1 cup of bread crumbs


Steam the vegetables until just tender.

In a food processor, mince the chilies. Add the chickpeas, paneer, nuts, seeds and herbs, frozen peas (if using), ground spices, salt and pepper and process until well combined. Add a little water if necessary. Transfer this mixture to a large bowl.

Now add the steamed vegetables to the food processor and pulse until the vegetables are mashed. Transfer to the bowl containing the chickpea, paneer mixture and stir until well combined. Now add enough bread crumbs to form a dough that you can shape into small patties or cutlets.

Line a large baking sheet with parchment paper. Rub your hands with a bit of oil and shape the mixture into patties. Place each cutlet on the baking sheet. In a preheat 375 degree oven, bake the cutlets for 15 - 20 minutes. Remove from the oven, carefully flip each cutlet and bake for another 15 - 20 minutes. You can place the cutlets under the broiler for another couple of minutes if desired.

Serve warm with some fresh chutney or sauce.

Makes 12 - 14 cutlets.
I'm sharing this with Abby of Eat the Right Stuff who is asking for vegetarian recipes to celebrate national vegetarian week, which runs from the 19th of this month to the 25th in the UK.

Monday, May 19, 2008

Fluffy candy

A Brazilian blogger published a text about what’s worth posting and what’s not. A friend of mine, who also has a blog, read it and wrote about it, too.My turn: I’ll tell you something about my family and some may think it’s blogging material and some may think it’s not. I lost a very dear uncle in a car crash in 2006. He was very close – also my brother’s godfather – and for a couple of days I

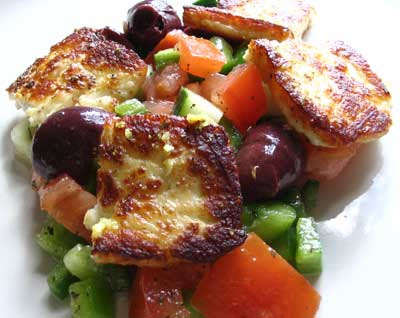
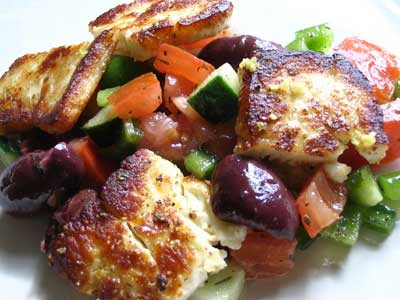
Fried Saganaki with Halloumi on a Greek Tomato Salad with Kalamata Olives

In only four short months of hosting our "No Croutons Required" recipe roundup, Holler and I seemed to have already established a tradition of submitting our own recipes to each other at the last possible moment when it's our co-founder's turn to host. Maybe it's the pressure of trying to come up with something extra special to please each other, or maybe it's … well, maybe it's just that the month just flies by so fast. Well, whatever, apparently it's my turn to be a bad blogger, but I think I've just managed to slide under the deadline for Holler's "Cheese Salad" challenge.

And what a challenge it was! It's not uncommon for me to dress a salad with a little parmesan or feta cheese, but I've never made a salad with cheese as the main feature or even in a prominent supporting role, so I had to give this one some thought (see Excuse #1). As it turns out, I have been thinking a lot lately about halloumi, a traditional salty Cypriot cheese made from sheep's, goat's and frequently cow's milk that Peter M from Kalofagas has been raving about lately. Known for its ability to hold its shape and firm texture when cooked and for the "squeaky" sound it makes when you chew it, I've been wanting to try it for a while now and it sounded like a fun cheese to create a "Cheese Salad" challenge around.

Once the decision to make halloumi the centrepiece of my salad had been made, it was only natural to make saganaki, an old Greek appetizer of fried or broiled cheese for which halloumi is a perfect choice, as Peter M and others I've come across have suggested. Nothing fancy here, as the idea was to surround the saganaki with a tidy, basic salad featuring simple, complementary Greek flavours like herbs, tomatoes, peppers and kalamata olives (and just one jalapeño to provide a little kick — I just can't resist).

It turned out that the real challenge was to find real halloumi cheese. The Greek bakery I always go to in town for the most perfect sheep's milk feta cheese, not to mention the plumpest and juiciest kalamata olives, had only just stopped selling halloumi right before I got there to do my shopping because, as they said, nobody ever bought it. What sort of Greeks do we have here in London! I was crestfallen, since there was no way I was going to buy the made-in-Canada supermarket knock-off that I was amazed to find under the suggestive name "halloum" without the "i" — it's made strictly from industrial cow's milk, and not packed in brine either, as the genuine article is supposed to be. Yes, I could have made the saganaki with Kefalograviera cheese, as it's usually done, but I had set all my hopes on using halloumi after Peter M's amazing write-ups. Just about on the point of giving up the cheese salad idea altogether though, I was lucky enough to find halloumi at a cheese shop in the local market that, even though it was packaged, was at least imported from Cyprus and packaged with brine, and listed sheep's and goat's milk ahead of the cow's. Those of you who live in a slightly more cosmopolitan city than London, Ontario probably ought to be able to find good authentic halloumi cheese at a local Greek shop, although you may have to ask for it.

Onward ho at all events, and I have to say with all honesty that fried halloumi is now among my favourite cheese snacks (thank you, Peter). After nibbling on the saganaki (the cook's prerogative, you know) it was just about all I could do to get it as far as the salad. But there it arrived for an astonishingly good Greek saganaki salad, and I'm not in the least ashamed to make this my entry for Holler's challenge if she'll still have me for being so tardy!
Fried saganaki with halloumi on a Greek tomato salad with kalamata olives

Dressing:

1/8 cup olive oil
1/8 cup red wine vinegar
juice from 1/2 lemon
scant 1/2 teaspoon dried thyme
scant 1/2 teaspoon dried basil
fresh ground black pepper to taste


Salad:

1 large tomato, seeded and diced
1/2 cucumber, diced
1/2 green bell pepper, seeded and diced
1 jalapeño pepper, seeded and minced
12 pitted kalamata olives


Saganaki:

2 tablespoons olive oil
8 ounces halloumi cheese, sliced into 1/4-inch pieces across the narrow end
juice from 1/2 lemon
grated zest from 1/2 lemon
fresh ground black pepper


Whisk together the dressing and toss with the salad ingredients in a large bowl.

Heat a large frying pan over just higher than medium heat. When hot, add the olive oil and swirl to coat the pan. Arrange the halloumi slices in the pan, trying to avoid touching, and fry until browned on the bottom. Use tongs to turn the cheese over and fry the other side until browned. While still in the pan, drizzle the lemon juice and scatter the lemon zest over the cheese, and finish with a good seasoning of fresh ground black pepper.

Remove from pan and add pieces of the halloumi over servings of the salad.

Sunday, May 18, 2008

Cranberry Coconut Milk Muffin Scones

Ironically, there is something intrinsically stressful about having a day off at home with nothing especially pressing to attend to. The time could be used productively, say to do some cleaning and laundry, catch up on some projects, transplant some of the plants that are exploding from their pots or perhaps tidying up a drawer or closet or two. The possibility of spending hours in the kitchen experimenting and creating tempts me, but then so do the rows of books that line my walls. I won't even mention the computer. After a few cigarettes, a quick shower and a breakfast of fried eggs, an orange, and a slice of toasted quinoa bread, consumed as I read the paper, the prospect of a walk in the sunshine presents itself, at least as a short diversion from deciding what I should be doing. Out I flee, my destination being the bank machine to pay some bills.

Upon return, it's too early to break out the wine, but it's too late to embark on a grand meal, at least I'm not motivated enough to bother. A quick glance at the black sleeping screen of my computer is quite enough to divert my gaze back to the kitchen, and then to the stack of books I am currently reading or mean to. I sit down at my table with a file of recently collected recipe ideas that haven't yet made it to my more organized binders, and finally decide I'll try Alice's recipe for Cranberry Muffins that I printed off back in January.

I've made many a muffin in my 34 years on this planet, but never has my muffin mix turned out more like dough than a thick pancake batter. Did I err? It was perhaps a mistake to basically plop the suggested portions into the bowl with little thought. Double check recipe. I cut back on the sugar and increased the vanilla, but other than that, followed the instructions. Wait, this is more like a scone dough. Intrigued, I press on. The result was a pleasant surprise that ended up serving as a replacement for that grand dinner that never was. In fact, this is all I had for dinner. Just a few of these little savory delights.
Cranberry Muffin Scones

2 cups of flour
1/2 cup of sugar
2 teaspoons of baking powder
1/4 teaspoon of sea salt
1 cup of dried cranberries
3/4 cup of coconut milk
1/4 cup of butter, melted
1 teaspoon of grated lemon rind
1 teaspoon of vanilla
1 large egg, lightly beaten


In a medium bowl, combine the flour, sugar, baking powder and salt. Stir in the cranberries and make a well in the center of the mixture.

In another medium small bowl, lightly whisk together the coconut milk, butter, lemon rind, vanilla and egg. Add to the flour mixture and stir just to combine.

Grease 12 muffin cups with butter. Spoon the mixture evenly into the prepared cups, pressing down the batter lightly with the back of the spoon. Bake in a preheated 400 degree oven for 20 - 25 minutes, or until lightly browned. Cool on a wire rack.

Friday, May 16, 2008

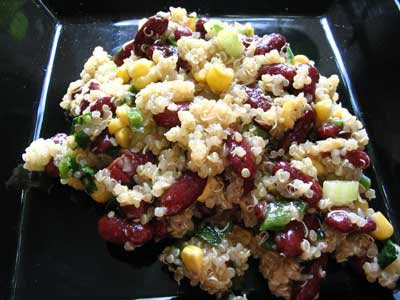
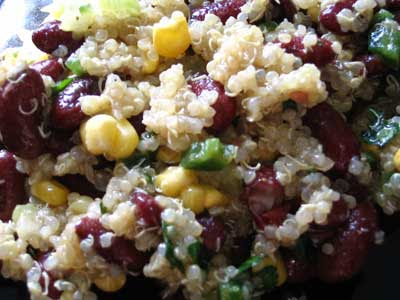
Kidney Bean and Quinoa Salad


Since I've started this food blog I've found that I'm constantly tempted to try to stage exotic and elaborate dishes when it comes to planning meals, but this temptation often comes crashing with a resounding thud against the scheduling demands of modern life. But I take comfort — not pleasure, mind you, that would be mean — in the fact that there's lots of other people like me who often need just to make a nourishing dinner without too much fuss and bother. And so I'd like to think that some of my simpler and less fancy dishes are just what a lot of you like to see.

Fortunately it's easy to sustain yourself on simple fare without losing flavour, and this kidney bean and quinoa salad packed with good carbohydrates and proteins meets those requirements. You can make this as a side dish for a more elaborate luncheon or dinner, but it makes a terrific no-fuss supper on its own when time is at a premium.
Kidney bean and quinoa salad

1 cup dried red kidney beans
3/4 cup quinoa
1 clove garlic, crushed or minced
1 cup fresh or defrosted frozen corn
1 celery stalk, diced
3 jalapeño peppers, seeded and diced
1 tablespoon red wine vinegar
1 1/2 teaspoons sea salt
1 teaspoon fresh ground black pepper
1 teaspoon ground cumin
1/4 cup fresh coriander, chopped
1/3 cup olive oil
1/4 cup lime juice


Rinse the kidney beans and soak overnight covered in several inches of water in a medium saucepan, with a little yogurt whey or lemon juiced added. Scrub the quinoa under cold running water, and soak in 1 1/2 cups water in a separate medium saucepan.

Bring the kidney beans to a boil, then reduce to low, add the garlic, and cover. Cook gently for 1 hour or until the beans are tender but not falling apart. Drain and transfer to a large bowl and toss with the corn, celery, jalapeños, vinegar, salt, pepper and cumin.

Meanwhile, bring the quinoa to a boil, then immediately reduce the heat to low and cover with a tight-fitting lid. Cook for 15-20 minutes or until the water is completely absorbed. Fluff with a fork and set aside until the beans have finished.

Transfer the quinoa to the salad bowl and add the coriander, olive oil and lime juice. Toss gently, and serve warm or chilled.

Crème caramel in tea cups


This is a classic dessert and most of you know it. It’s actually similar to the sweetened condensed milk custard I posted a while ago and, to be completely honest, I like my recipe better. What can I do? I’m a Brazilian and I love sweetened condensed milk in just about anything.

What makes this dessert extra special is that it marks my first time using a vanilla bean - handling it was

Thursday, May 15, 2008

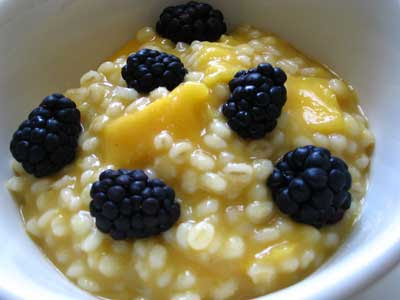
Mango Barley Porridge with Blackberries


Tangy chunks of mango in a thick, creamy mango juice broth surrounding soft and chewy grains of barley, topped with the mild tartness of fresh blackberries — even the most reluctant of porridge eaters will be back for a second bowl of this naturally sweet and colourful breakfast delight. Cooked at low temperature in a risotto style with the juice slowly added to preserve the barley, this porridge does take about two hours to cook even though the preparation and method are extraordinarily simple, so it's definitely not a weekday breakfast option for most of us. But do try it on a Sunday morning when you've got plenty of time — your family will love you for it.
Mango barley porridge with blackberries

1 cup pearl barley
2 1/2 cups water
2 cups mango juice, room temperature
6 green cardamom pods
1/2 teaspoon sea salt
1 tablespoon honey
1 large red mango, peeled and chopped
1/4 pint blackberries


Rinse the barley and soak overnight in 2 1/2 cups water in a medium saucepan. Bring to a boil, then reduce the heat to its lowest setting and cover. Simmer, stirring every 10 minutes or so, for 45 minutes.

Stir in 1 cup of the mango juice. Put the cardamom pods in a tea ball and add to the saucepan along with the salt. Cover, and continue to simmer, stirring every 10 minutes as before.

After 20 and 40 minutes, stir in another ½ cup portion of the mango juice, while continuing to stir every 10 minutes. When the last portion of the mango juice has cooked in the barley for 20 minutes, you should end up with a thick, but not too thick porridge. Remove the tea ball and stir in the honey and chopped mango. Simmer for 5 minutes.

Serve hot or at room temperature, topped with fresh blackberries. Serves 4 - 6.
I'm sharing this with Escapades who will be hosting the next edition of Weekend Breakfast Blogging. The theme is mangoes.

Wednesday, May 14, 2008

Crepes filled with corn and nutmeg

Don’t you love going through cookbooks/websites with lots of photos? Isn’t it wonderful to know what to expect – visually speaking – from a recipe?After taking a look at this, I knew I would end up making it. I’m a big fan of crepes and they look so adorable served this way!I thought these were good, but in my opinion they would have been better with some sort of sauce. I think the sage brown

Tuesday, May 13, 2008

Paratha Stuffed with Sweet Potato and Potato

Flatbreads are one of the special delights of Indian cuisine. The possibilities are literally endless. Shallow-fried, deep-fried, baked, toasted, leavened and unleavened, stuffed, savory, sweet, and sometimes spiced, these traditional accompaniments to Indian meals come in a variety of flavours, shapes and textures.

Somehow or other, this is one area of Indian cooking that I have sadly neglected, and honestly I'm not sure why. I bother to make my own pastry when required, have enjoyed making bread in the past, do not shy away from spending a few hours in the kitchen when I have the time, and cook Indian dishes on a regular basis. I plead distraction. I could probably fill a small library with my food ideas.

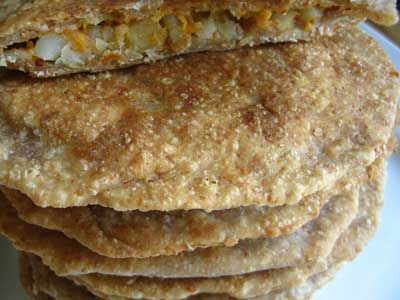
And so I'm thankful Srivalli of Cooking for all Seasons has decided to host Roti Mela to celebrate the goodness of Indian flatbreads. Inspired by the idea, I made these crispy stuffed parathas. Time consuming, yes, but absolutely worth the effort. The dough was an absolute pleasure to work with and will certainly serve as a base for future creations. The possibilities for fillings have occupied my mind since I made these this past weekend. I'm thinking paneer and spice is next.

Paratha with Sweet Potato and Potato Filling

1 1/2 cups of whole wheat flour
1 1/2 cups of unbleached white flour
1 teaspoon of salt
2 tablespoons of melted butter
1 cup of water
1/4 cup of oil for frying

Filling:

1 medium sweet potato
1 tablespoon of oil
1 teaspoon of salt
2 teaspoons of cumin seeds
2 teaspoons of black mustard seeds
2 small potatoes, finely chopped
1 teaspoon of cayenne
3/4 cup of water


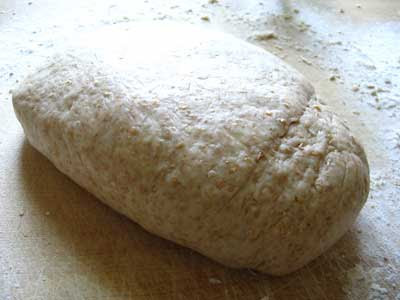
Combine the flours, salt, ghee and water in a bowl until a dough is formed. Turn out onto a lightly floured board and knead for about 10 minutes or until the dough is smooth and elastic. Cover with plastic wrap and let sit for 1 hour.

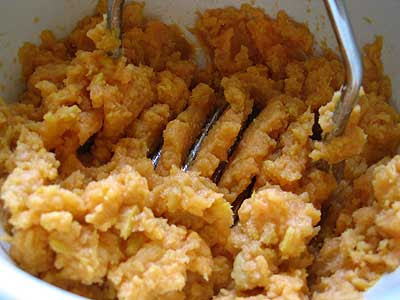
Peel and boil the sweet potato until tender. Mash and set aside.

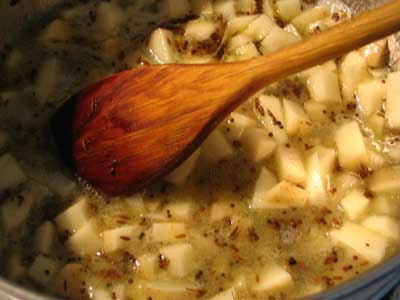
Heat the oil in a medium pot until hot. Add the seeds and salt and stir and fry until the mustard seeds begin to pop. Now add the potatoes, cayenne and water. Cook, stirring often, for about 10 minutes, or until the potato is just tender. Stir the mashed sweet potato into the potato mixture.

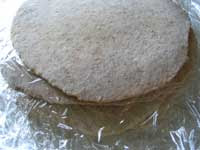
Shape the dough into a long log and divide into 16 equal portions. Shape each piece into a ball, and roll into 5 1/2 inch rounds on a lightly floured board. Stack the rolled out rounds, separated with plastic wrap.


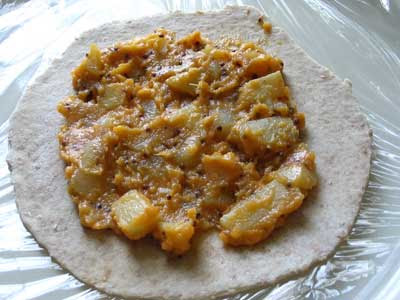
Spread a few teaspoons of filling over a rolled out round, leaving a 1/2 inch border. Brush the border with water, and top with another rolled out round. Press the edges together firmly to seal. Repeat until all 8 paratha are filled.

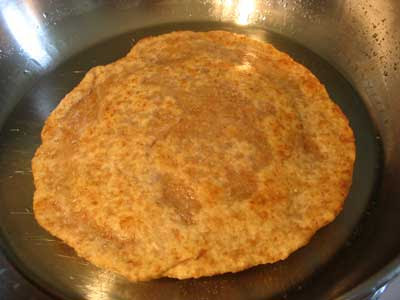
Heat the 1/4 cup of oil over medium heat in a large frying pan until hot. Cook one stuffed paratha at a time, until nicely browned on both sides - about 5 minutes a side. Drain on paper towels. The cooked parathas can be kept warm in the oven while you fry up the remainder. Add more oil to the pan as needed.

Makes 8 parathas.

Caramel-dark chocolate truffles with fleur de sel

Cookies, cakes, bread. I do love baking. But I also love making candy and working with chocolate as well. There was an Easter, a couple of years ago, when I made almost 50 chocolate Easter eggs. Some of them had creamy and gooey fillings, like this heart shaped chocolate I posted last year. YUM!I printed a recipe for tangerine truffles but the result was a much too soft, messy – although quite

Monday, May 12, 2008

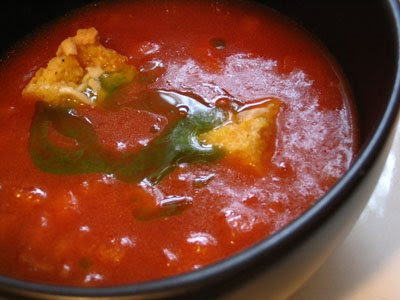
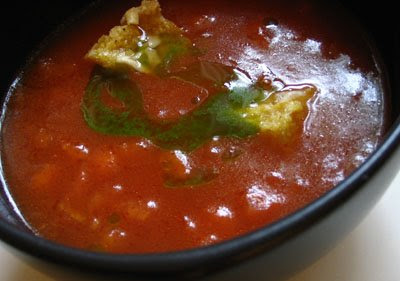
Tomato Soup with Polenta Croutons and Chive Oil

Tomato Soup with Polenta Croutons and Chive Oil
Considering how often I cook with tomatoes, I've perhaps surprisingly never really been a fan of tomato soup. I think the canned varieties I was exposed to as a child turned me off of the idea. I've also never acquired a taste for canned tomato juice. It has the texture of moist chalk and tastes much like the tin it comes in. Today, my aversion to tomato soup is no longer. I used a recipe that a dear co-worker passed onto me as a guideline. I thought it sounded good, but I just knew it was going to taste heavenly as the aroma of the simmering soup pleasantly took over the kitchen.

The addition of polenta Parmesan croutons here makes this a more substantial tomato soup, but that didn't stop me from having a second bowl. Be sure to make the croutons ahead of time.

Tomato Soup with Polenta Croutons and Chive OilTomato Soup with Polenta Croutons and Chive Oil
Recipe by
Published on May 12, 2008

A vibrant and fresh-tasting tomato soup flavored with homemade fresh chive oil and topped with polenta Parmesan croutons

Print this recipePrint this recipe
Chive oil:
  • 1/2 cup fresh chives, chopped
  • 1/3 cup olive oil
Soup:
  • 1 tablespoon olive oil
  • 1 onion, diced
  • 6 cloves garlic, sliced
  • 1/2 cup tomato paste
  • 1/2 teaspoon fresh cracked black pepper, or to taste
  • 4 cups vegetable stock
  • 2 cups water
  • 1 teaspoon sea salt, or to taste
  • 2 plum tomatoes, peeled, seeded and diced
  • juice from 1 large lemon
Garnish:
Instructions:
  • Begin by making the chive oil. In a blender, purée the chives with the oil until smooth. Line a strainer with cheesecloth and strain the oil and chive mixture, pressing with a spoon to extract as much oil as possible. Set aside.

  • In a large heavy pot, heat the oil over medium heat. Fry the onion and garlic until softened, about 5 minutes. Now add the tomato paste and black pepper. Cook, stirring often, until it darkens, about another 5 minutes. Now add the stock, water and salt, bring to a boil, reduce the heat to low, and cover and simmer for 20 minutes. Strain through a sieve into another large pot.

  • Return to the stove, and add the lemon juice and chopped tomatoes. Simmer for another 10 minutes. Ladle into small bowls, drizzle with a bit of the chive oil, and top with polenta croutons.

Makes 8 servings

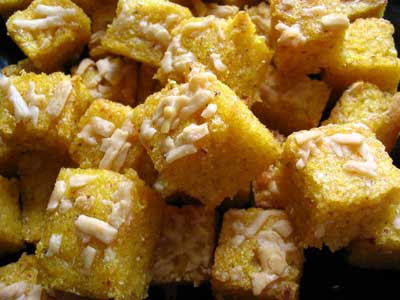
Polenta Parmesan CroutonsPolenta Parmesan Croutons
Recipe by
Published on May 11, 2008

Dense and delicious polenta croutons baked with Parmesan cheese — these are great for salads and also hold their shape in soups — they're also terrific as a snack by themselves

Print this recipePrint this recipe
Ingredients:
  • 3 cups water
  • 1 1/2 cups yellow cornmeal
  • 1 teaspoon cayenne
  • 1 teaspoon sea salt
  • 2 teaspoons olive oil
  • fresh cracked black pepper to taste
  • 1/4 cup fresh grated Parmesan cheese
Instructions:
  • Bring the water to a boil in a medium saucepan. Reduce the heat to medium-low, and pour in the cornmeal, stirring constantly. Simmer for about 10 minutes, stirring often, until the mixture is thickened. Remove from heat, and stir in the cayenne, salt, olive oil and black pepper.

  • Grease an 8 × 8 baking pan. Transfer the polenta into the pan and spread evenly with a spatula or knife. Sprinkle with grated Parmesan cheese. Leave to cool.

  • Preheat an oven to 450° and line a baking sheet with parchment paper. Cut the polenta into small cubes and gently transfer the cubes to the baking sheet. Bake for 30 minutes or until the croutons are crisp and golden, flipping occasionally with a pair of tongs so that each side of the cubes browns evenly.

Makes about 3 dozen croutons
Tomato Soup with Polenta Croutons and Chive OilI'm sharing this with Chef Erik who is hosting a Veg Head carnival. As you may have guessed, the theme is vegetarian recipes.