Wednesday, October 31, 2007

Spicy Indian Cabbage and Green Peas

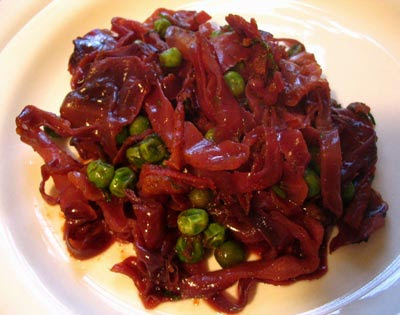
Cabbage is one of those vegetables I buy without knowing what I'm going to do with it and then look for a solution. Fortunately this vitamin C-rich vegetable is widely used around the world, so there's no shortage of ideas. And if you like Indian spicing and green peas as much as I do, then this bandhgobhi hari matar tarkari that I've adapted from Yamuna Devi's Lord Krishnas Cuisine is the cabbage idea for you.

A specialty of the Amritsar region, this fragrant and spicy cabbage and pea dish is made with a very aromatic spice blend unlike any other I've come across, and is typically cooked in clay pots over open fires. But since most of us don't have that luxury (!) this recipe has been adapted for modern stovetops and ovens. Serve over white rice, on its own, or with a dollop of yogurt on top as an accompaniment to any Indian meal. If you're planning on eating this dish over more than one day, you might want to reduce the spices slightly as the heat in the vegetables increases over time.
Spicy Indian cabbage and green peas

Spice blend:

1/2 teaspoon caraway seeds
1/2 teaspoon coriander seeds
6-8 black peppercorns
5 whole cloves
1 teaspoon cardamom seeds


Vegetables:

2 tablespoons butter
2 tablespoons olive oil
2 large tomatoes, seeded and chopped
1/2 teaspoon turmeric
1/2 teaspoon paprika
1/4 teaspoon cayenne
1 small cabbage, about 1 pound, cored, trimmed and finely sliced into shreds
1 cup fresh or frozen green peas, defrosted
4 tablespoons fresh dill, chopped
1 teaspoon sea salt


Combine the spice blend ingredients in a spice mill or coffee grinder and grind to a powder. Set aside.

Preheat an oven to 325°. Heat the butter and oil in a large saucepan over medium-high heat. When hot, add the tomatoes, half of the spice blend, turmeric, paprika and cayenne, and cook, stirring frequently, for about 10 minutes or until the tomatoes are reduced to a thick sauce. Add the cabbage and stir to cover the vegetable with the sauce.

Remove the cabbage and sauce to a large casserole dish. Cover and place in the preheated oven. Cook for 30 minutes, stirring once or twice. If you are using fresh peas, stir in the peas after 15 minutes. Otherwise, stir in the defrosted frozen peas only in the last 2-3 minutes, along with the dill, salt and remaining spices.

Toss to mix and serve hot. Serves 6-8 as a side dish.
Tuesday, October 30, 2007

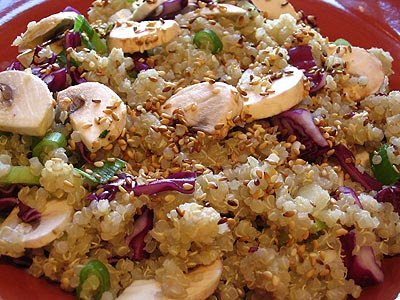
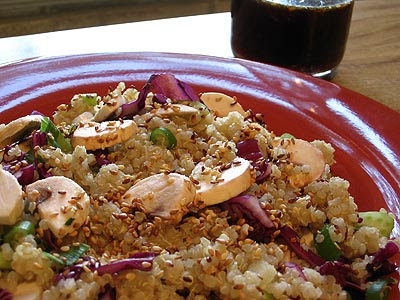
Japanese-Style Quinoa Salad and Tamari-Ginger Dressing

Judging by the number of requests I've received for quinoa recipes, it seems that this ancient staple food of the Andes, otherwise known as Inca rice, is enjoying a surge in popularity these days. And with its unique delicately sweet and nutty flavour as well as a nearly perfect amino acid balance rare to plant foods, it's a popularity that's well deserved. Toss in a good source of fibre, protein, iron, calcium, phosphorus and vitamins B and E, and it's a wonder that everyone's not eating quinoa.

I'll often cook 1/2 cup of quinoa in a cup of water in the manner I've described below and dress it with some toasted sesame seeds and a little tamari sauce if I just need a quick and easy grain side dish for dinner. But it's always nice to try something different, and this simple and hearty quinoa salad takes only a little more time and is not only very hearty and healthy, it's absolutely delicious!

I use red cabbage here to give the salad colour, but green or Chinese cabbage will taste just as good. Another option is to add a 1/4 cup of slivered almonds.
Japanese-style quinoa salad with tamari-ginger dressing

Salad:

1 1/4 cups quinoa
1/2 small red cabbage, chopped
5 large white mushrooms, sliced
1 stalk celery, sliced
3 scallions, thinly sliced, both green and white parts
3 tablespoon white sesame seeds, toasted


Dressing:

3 tablespoons tamari or soy sauce
juice of 2 lemons
1/4 cup water
1 1/2 teaspoons maple syrup
1 teaspoon fresh ginger, grated with a fine grater


Scrub the quinoa under cold running water over a very fine strainer, then soak overnight in 2 1/2 cups water. Bring to a boil, then reduce the heat to low and cover, letting simmer for 20 minutes or until the water is absorbed. Remove from the heat and fluff thoroughly with a fork. Set aside in a large salad bowl to cool to room temperature.

Shake together the dressing ingredients and set aside in a cruet to let the ginger permeate through the dressing.

Fluff the quinoa again after it's cooled and add the rest of the salad ingredients. Serve cold or at room temperature with a splash of the dressing, shaking the cruet a little before each serving.

Serves 8 to 10.

Monday, October 29, 2007

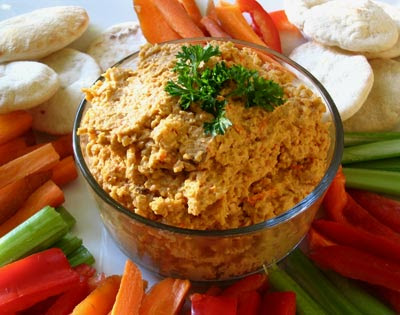
Spicy Roasted Red Pepper Hummus

When I saw a recipe for Roasted Red Pepper Hummus over at The Budding Cook, I instantly had a craving for some. Of course, it's easy to buy a small tub of good quality hummus in London, but it's much more satisfying to experiment in your own kitchen, especially if you are like me and want some hummus with a spicy kick. Originating in the Middle East and now popular throughout the world, hummus is a thick dip or spread consisting mainly of ground chickpeas, tahini, garlic and lemon juice. This versatile blend of flavors can be enhanced with an infinite combination of herbs, spices and vegetables.

I'm not one to boast, but I can honestly say the recipe I came up with yielded some of the best hummus I have tasted to date. I added a bit of cream cheese to my hummus, but I'm thinking goat's cheese would work just as nicely and plan to try it next time. Adjust the amount of olive oil you use to achieve your desired consistency. If you want to roast your own peppers instead of using the jarred variety, detailed instructions can be found here.

Spicy Roasted Red Pepper Hummus

1 1/2 cups of cooked chickpeas (about 3/4 cup dried chickpeas)
1 medium red pepper, roasted and chopped into small bits
1 habanero pepper, roasted and chopped into small bits
2 cloves of garlic, crushed
1 teaspoon of paprika
1/4 teaspoon of cayenne
1/2 teaspoon of ground cumin
1 heaping tablespoon of tahini
2 - 3 tablespoons of cream cheese
juice from one lime
2 - 3 tablespoons of olive oil
1/2 - 1 teaspoon of sea salt


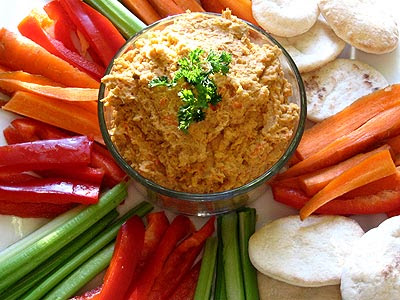
Combine the peppers, garlic, spices, tahini, cheese and lime juice in a small bowl. In a food processor, blend with the chickpeas, olive oil and salt until smooth. If necessary, process the mixture in batches. Serve with flatbread, such as pita, crackers and vegetables.

Makes approximately 2 cups of hummus.

Sunday, October 28, 2007

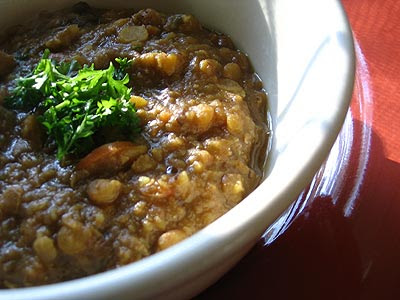
Lentil Soup with Prunes and Apricots

With the Fall weather upon us here in Southwestern Ontario, I've been inspired to make more warming soups of late. This sweet and sour soup is adapted from a unique little cookbook entitled Small Bites. Once the chopping is done, it simply simmers on the stove top, allowing you time to prepare the rest of your meal. I served it with Polenta and Mushroom Ragout. It's a fairly thick soup, especially if you serve it the next day, so feel free to add more stock to suit your tastes. If you are not using vegetable stock, increase the amount of salt and add a few teaspoons of celery seed. If desired, garnish with pomegranate seeds.
Lentil Soup with Prunes and Apricots

3 tablespoons of olive oil
2 onions, chopped
2 carrots, finely chopped
2 - 3 garlic cloves, finely chopped
1 inch piece of ginger, grated
1/2 teaspoon of salt
1/2 teaspoon of freshly cracked black pepper
6 pitted prunes, roughly chopped
8 dried apricots, roughly chopped
1 heaping teaspoon of ground cumin
1 teaspoon of ground coriander
1/2 teaspoon of ground cardamom
1/4 teaspoon of ground cloves
2 cinnamon sticks
6 cups of vegetable stock
1/2 cup of red lentils
1 1/2 cups of green lentils
1/4 cup of yellow split peas
juice of 1 lemon
small handful of mint leaves, chopped
small handful of parsley, chopped


Heat the oil over medium-high heat in a large pot. Add the onions, carrots, ginger, garlic, salt and pepper, and saute for about 10 minutes, or until the vegetables are softened. Add the dried fruit, ground spices and cinnamon sticks. Saute for a few more minutes and then add the stock or water. Stir in the lentils, bring to a boil, and immediately reduce the heat to low. Simmer, covered, for about 1 hour or until the lentils are very soft. Stir occasionally.

Now add the fresh herbs and lemon juice and taste for seasoning. Puree a small portion of the soup if desired. Serve hot, and garnish with some parsley. This recipe yields 6 - 8 servings and can be frozen if desired.

Friday, October 26, 2007

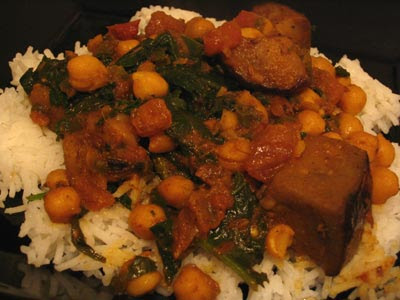
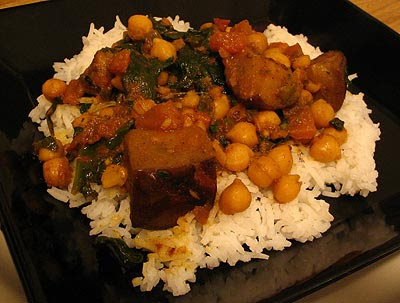
Baked Gingered Chickpea Stew with Eggplant and Spinach

A variation of this textured chickpea stew can be found in every kitchen in North India, where it is a favourite for Sunday dinners. Very much like a baked chana masala with eggplant and spinach, kabli chana baigan tarkari is almost always served with pooris, but it is also very delicious served on a bed of rice with a green salad or a potato dish on the side. Like so many other Indian dishes I've come to love, this version is one I've modified from Yamuna Devi's Lord Krishna's Cuisine, a book I cannot recommend highly enough as an essential guide to authentic and delicious Indian cooking.
Baked gingered chickpea stew with eggplant and spinach

3/4 cups dried chickpeas
8 tablespoons ghee, or a mixture of butter and olive oil
1 medium eggplant, cut into 1-inch cubes
1 1/2 tablespoons fresh ginger, minced
handful of green chillies, to taste, seeded and minced
2 teaspoons cumin seeds
1/4 teaspoon asafoetida powder
2 large tomatoes, seeded and chopped
1 tablespoon ground coriander
1 teaspoon paprika
1/2 teaspoon cayenne
1 teaspoon turmeric
1/2 cup water
1 pound fresh spinach, trimmed and coarsely chopped
small handful fresh coriander or parsley, chopped
1 teaspoon garam masala
1 1/2 teaspoons sea salt
fresh ground black pepper


Soak the chickpeas overnight in water with a drop of yogurt whey or lemon juice. Bring to a boil, then reduce the heat to low, cover, and simmer for 1 hour or until the chickpeas are tender. Drain and set aside.

Preheat an oven to 325°. Meanwhile, heat 6 tablespoons of the ghee or butter and oil mixture in a large saucepan over medium-high heat. When hot, add the eggplant and fry, stirring frequently, for about 10 minutes or until the cubes are well-browned. Remove with a slotted spoon and set aside.

Add the remaining ghee or butter and oil to the pan. When hot, add the ginger, chillies and cumin seeds and fry for 2 to 3 minutes or until the seeds turn dark brown. Toss in the asafoetida, wait a few seconds, then stir in the tomatoes. Add the coriander, paprika, cayenne and turmeric and cook until the tomatoes reduce to a thick sauce, about 10 minutes.

Add the water and bring to a boil. Reduce the heat to low and stir in the chickpeas, eggplant and spinach. Remove to a casserole dish, cover, and put in the preheated oven. Cook for 30 minutes. Stir in the parsley, garam masala, salt and pepper before serving.

Serves 4 to 6.

Wednesday, October 24, 2007

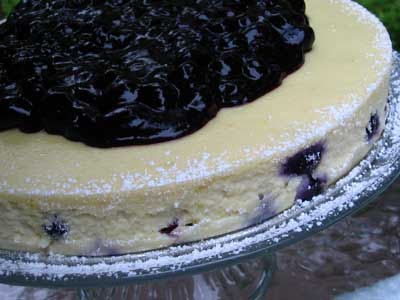
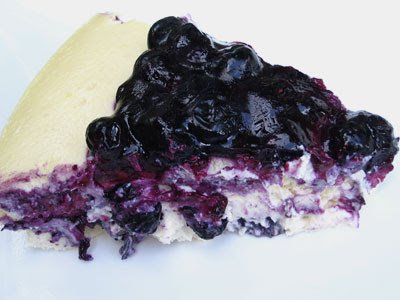
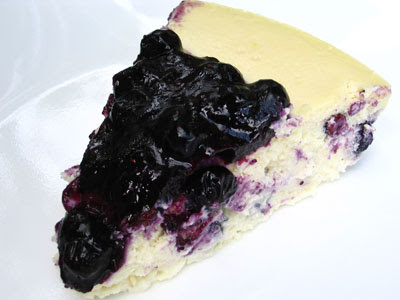
Blueberry Ricotta Cheesecake

One of the items on my ongoing list of recipes to make is a baked cheesecake. Until recently, I had never made a cheesecake of any sort, though cheesecake is certainly one of my favorite desserts. I have fond memories of the no bake cherry cheesecake my mom used to make for me. I don't often have dessert, as most of the meals I make are quite satisfying, but when I found this recipe for Blueberry Ricotta Cheesecake I simply could not resist. It's a fancy looking cake, but it's actually pretty easy to make and needless to say, absolutely heavenly to taste.
Blueberry Ricotta Cheesecake

1 pound of cream cheese
1/2 cup of sugar
1 pound of smooth ricotta cheese
1 tablespoon of lemon juice
grated lemon zest from one small lemon
2 teaspoons of vanilla
wee bit of salt
4 eggs
1/3 cup of unbleached white flour
1 cup of blueberries


Butter a 9-inch spring form pan and set aside. In a large bowl, cream together the cream cheese and sugar with an electric mixer set to medium until smooth. Add the ricotta, lemon zest, lemon juice, vanilla and salt. Blend until well mixed. Add two of the eggs, beat for a minute and then add the remaining two eggs and beat for another minute. Add the flour, and beat on low speed until well mixed. Fold in the blueberries and transfer to the prepared pan. Bake in a preheated 300 degree oven for about 80 minutes, or until the the cake is set and golden. Turn off the oven, open the door slightly, and let the cake sit for another 20 minutes.

Transfer the cake to a wire rack and let it cool completely before removing the sides of the spring form pan.
Blueberry Sauce

2 cups of blueberries
1/3 cup of sugar
2 tablespoons of lemon juice
1 heaping tablespoon of corn starch


Combine the blueberries, sugar, lemon juice and corn starch in a medium saucepan. Over medium heat, gently bring the mixture to a boil. Cook for about 5 minutes, or until slightly thickened. Remove from the heat, let cool for about 15 minutes. Spoon the blueberry sauce over the top of the cheesecake.

Tuesday, October 23, 2007

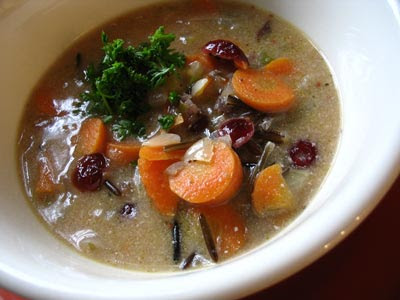
Cranberry Wild Rice Soup

Inspired once again by the top quality recipes provided by Chef Jules, I made another one of his nourishing soups. This time around it was a rather unusual soup that appealed to me because of the unique blend of flavours and the colourful presentation. It's as good as it sounds and looks and it's really easy to prepare besides. I've made a few minor modifications, but essentially just followed the original recipe. Add more salt and a few teaspoons of celery seed if you are not using vegetable stock.
Cranberry Wild Rice Soup

4 tablespoons of unsalted butter
1 carrot, finely chopped
1 stalk of celery, finely chopped
1 medium onion, chopped
1 green onion, chopped
3 tablespoons of unbleached white flour
3 cups of vegetable stock
1 1/2 cups of cooked wild rice
2/3 cup of dried cranberries
1/2 cup of milk
1/2 cup of yogurt
2 tablespoons of robust red wine
1/4 teaspoon of dried sage
sea salt and freshly ground black pepper to taste

parsley for garnishing


Prepare the wild rice ahead of time. Simply wash 2/3 cup of wild rice in a strainer. Bring the rice to a boil in roughly 3 cups of water, reduce the heat to low, and cover and simmer for 30 - 40 minutes, or until
the rice puffs open and it loses it's crunch. Drain and set aside.

In a large pot, melt the butter over medium heat. Add the carrot, celery and onion. Cook, stirring occasionally, until the carrot is tender - about 8 minutes.

Add the flour and stir until smooth. Gradually stir in the vegetable stock, whisking as you add it to prevent lumps from forming. Increase the heat to medium-high and stir until the soup is thickened, about 5 minutes.

Next add the rice and cranberries. Reduce the heat to medium low, cover and simmer, stirring occasionally, until the cranberries are soft and plump (roughly 10- 15 minutes). Stir in the sage, milk, yogurt, wine and seasonings. Cook for another few minutes, stirring occasionally. Serve in soup bowls, and garnish with parsley.

Makes 4-6 servings.
I've submitted this recipe to a upcoming Garden Cook event featuring cranberries.

Sweetened condensed milk cocada

Going through one of my cookbooks in search of a salad recipe, I “accidentally” opened it in the sweet chapter. :)In one of his twice a year sudden urges for sweets, João saw a photo of cocada (a very traditional candy made of coconut) and asked me to make it.As I would not be able to find freshly grated coconut to make that specific recipe, I remembered something I had seen on a dear friend’s

Monday, October 22, 2007

Interlude

The blog quebecois points to a menu of terrifying food that I promise never to feature in my kitchen.

Warning: Not for the squeamish.

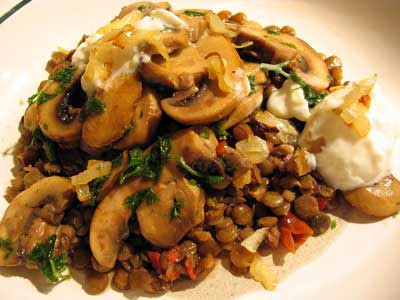
Lentils and Garlic Mushrooms


Yet another recipe inspired by Madhur Jaffrey's World Vegetarian. Serve with rice and an Indian flatbread or Whole Wheat Olive Oil Biscuits for a satisfying vegetarian meal.

To make this dish, you will need to prepare Lentils with Browned Onion and Garlic.
Lentils and Garlic Mushrooms

1 pound of white mushrooms, sliced
a few tablespoons of olive oil
3 garlic cloves, finely chopped
1 teaspoon of sea salt
freshly cracked black pepper
1/2 teaspoon of cayenne pepper
5 tablespoons of chopped fresh parsley
plain yogurt for topping (I highly recommend goat's milk yogurt)


Heat the oil in a large frying pan or wok over high heat. When hot, add the garlic to the pan, quickly followed by the mushrooms. Stir and fry until the mushrooms soften and begin to release their liquid. Add the salt, pepper, cayenne and most of the parsley. Stir to combine.

Serve in bowls or pasta plates, with the lentils forming the bottom layer. Top with mushrooms and a dollop of yogurt. Sprinkle the browned onions over the yogurt and garnish with remaining parsley.

Tomato, Minas cheese and eggplant salad

Isn’t it wonderful when a recipe exceeds our expectations?? I love it when that happens. This salad is one of those recipes.When I saw the photo on the book, I thought it would be good. But it turned out to be really, really good.The dressing plays an amazing part here – and the garlic is the one to blame. I have a friend who loves to cook with garlic and I’m sure he would like this dressing very

Sunday, October 21, 2007

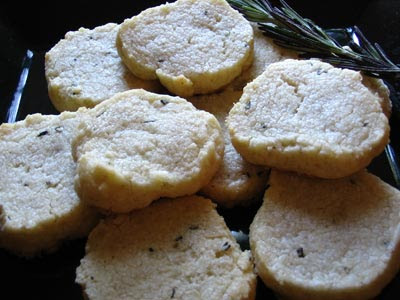
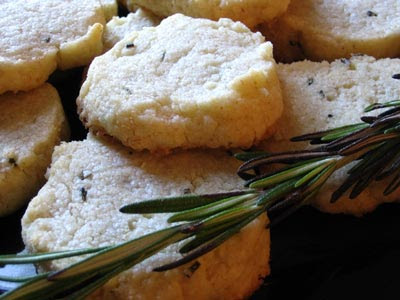
Rosemary Parmesan Shortbread

This savory shortbread smells heavenly as it bakes in the oven and it tastes even better than it smells. You can substitute 1 teaspoon of dried rosemary, but I highly recommend using fresh rosemary as it enhances the taste of the shortbread. Serve as an appetizer or for dessert or a snack.
Rosemary Parmesan Shortbread

1 cup of butter, softened
2 tablespoons of sugar
1 cup of unbleached white flour
3/4 cup of corn starch
1 teaspoon of salt
1 cup of grated Parmesan cheese
1 tablespoon of fresh rosemary


In a large bowl, beat the butter and sugar together until light and creamy. Add the rest of the ingredients, and mix until well blended. Transfer to a lightly floured surface and form until two logs 10 inches long. Wrap each log in plastic wrap and refrigerate for at least 1 hour or up to 24 hours.

Preheat the oven to 350 degrees. Grease or line baking sheets with parchment paper.

Slice the logs into 1/4" - 1/2" slices and place 2" apart on the baking sheets.

Bake for 15 minutes or until the shortbread begins to brown. Cool on the baking sheets for 5 minutes and then transfer to a wire rack to cool.

Makes approximately 30 - 40 shortbread biscuits.
I'm sharing this recipe with The Well-Seasoned Cook who will be hosting the next edition of Weekend Herb Blogging, a weekly food event started up by Kalyn's Kitchen. Be sure to check out Kalyn's second anniversary roundup.

Saturday, October 20, 2007

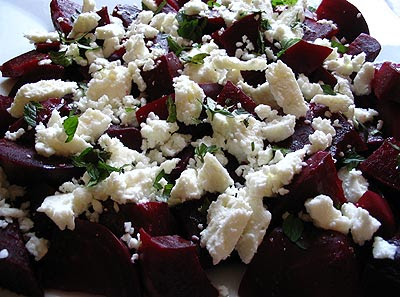
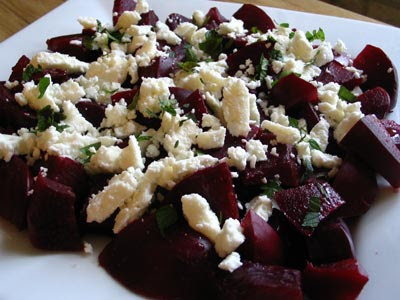
Beet and Feta Salad

Beet and Feta Salad
For a long time I've enjoyed the taste of pickled beets, but only recently have I become a fiend for fresh beets. Now I find I'm always on the lookout for new ideas with beets, especially as beets are currently in season. As I also adore feta cheese, I made this beet and feta salad the day after I found the recipe. The strong taste of beetroot goes very well with the sharp flavor of feta cheese.

Beet and Feta Salad Beet and Feta Salad
Recipe by
Published on October 20, 2007

This simple but classic beet and feta salad makes a lovely and nourishing accompaniment to any meal

Print this recipePrint this recipe
Ingredients:
  • 2 pounds of beets
  • 1 tablespoon of olive oil
  • 1 teaspoon of white wine vinegar or rice vinegar
  • 1 teaspoon of red wine vinegar
  • pinch of sea salt
  • pinch of freshly ground black pepper
  • 1/3 cup of feta cheese
  • 1 tablespoon of fresh mint, chopped
Instructions:
  • Trim the green tops from the beets and wash well. In a large pot, boil the beats until they are tender enough to be pierced with a fork - about 1 hour, depending on the size of the beets used. When the beets are done, remove them from the heat and let them cool. Remove the skins and cut into wedges.

  • To make the vinaigrette, in a small bowl whisk together the oil, vinegar and salt and pepper. Arrange the beets on a platter and drizzle with the vinaigrette. Sprinkle with the cheese and fresh mint.

Makes 4 - 6 servings
Beet and Feta Salad

Friday, October 19, 2007

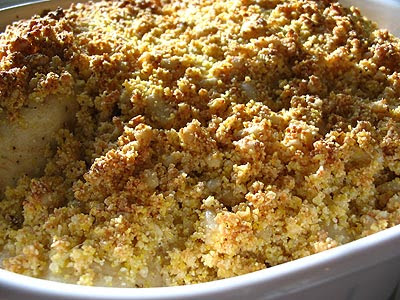
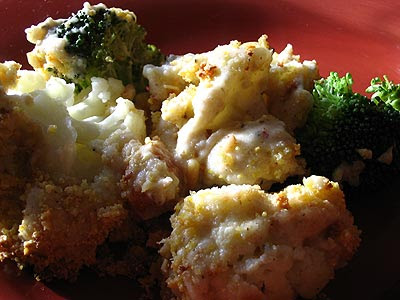
Broccoli-Cauliflower Mornay

These lightly-steamed vegetables coated in a white cheddar mornay sauce and baked under a crusty topping is an old standby of my good friend Andrew, and it's a wonderful way to use up broccoli or cauliflower that's gone a little past the peak of freshness. The use of white cheddar cheese and whole wheat flour as well as the addition of lemon juice are slight departures from the classic mornay sauce, but they definitely enhance the flavours of the vegetables — and the browned parmesan-cornmeal-nut topping is worth licking off the plate.

This recipe makes quite a lot, but it can easily be halved using only the broccoli or the cauliflower.
Broccoli-cauliflower mornay

1 large head broccoli, cut into florettes and sliced and pared stems
1 large head cauliflower, cut into florettes
1 large potato, chopped
2 carrots, sliced


Cheddar mornay sauce:

½ cup butter
10 tablespoons whole wheat flour
4 cups milk
2 cups grated white cheddar cheese
2 teaspoons sea salt
fresh ground black pepper
juice of 2 large lemons


Topping:

2 tablespoons butter
½ cup cornmeal
½ cup chopped cashews, almonds or pine nuts
½ cup grated parmesan cheese


Steam the vegetables in batches until just tender (about 7 minutes for the broccoli and cauliflower, about 9 minutes for the potatoes and carrots). Drain each batch and place in a large baking dish. Mix the vegetables once they're finished.

Preheat the oven to 350°. Meanwhile, prepare the mornay sauce by melting the butter in a medium saucepan over medium heat. Stir in the flour. Gradually add the milk, stirring with a whisk until the sauce thickens. Add the cheddar cheese and stir until it melts. Season with salt, black pepper and lemon juice. Pour over the vegetables.

To prepare the topping, melt the butter in another saucepan and stir in the cormeal, chopped nuts and parmesan cheese. Sprinkle the topping over the vegetables and bake uncovered for 15 minutes, or until heated through and the topping is golden brown.

Serve hot or at room temperature. Serves 8 - 12.

Wednesday, October 17, 2007

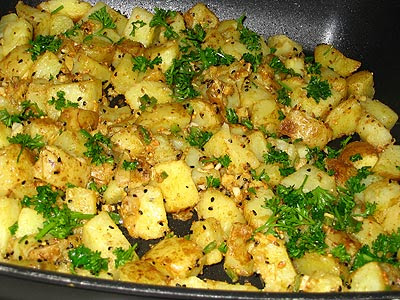
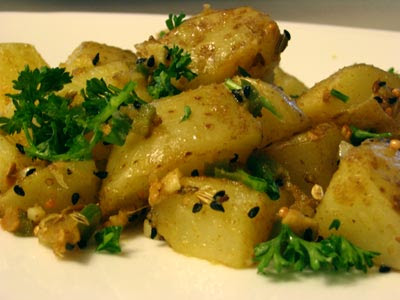
Bengali-Style Crunchy Potatoes

A reader recently noted that judging by my entries here, I don't cook with potatoes very often. It's not that I don't enjoy potatoes, but in general, I consume carbohydrate packed foods like pasta and potatoes in moderation. My reader's observation got me thinking about the versatility of such foods however, and I quickly recalled one of my favorite spicy potato recipes made with panch phoran, a spice mixture of fenugreek, nigella, mustard, cumin and fennel seeds (also known as panch phoron, panch puran, panchpuran, punch puram, punchpuram, and Bengali five-spice). If you don't happen to have any panch phoran on hand, it's easy to make your own and it keeps in a sealed jar for a good many months.

Depending on the size of your pan and the quantity of potatoes you use, it might be necessary to fry the potatoes in two batches to ensure they brown evenly. Simply set the first batch of potatoes aside while you fry up the second batch and then return all of the potatoes to the pan before adding the spice mixture and lemon juice.
Crunchy Potatoes, Bengali-Style

4 - 5 large potatoes, chopped into cube-sized chunks
3 - 4 tablespoons of ghee, or a mixture of butter and oil
2 tablespoons of panch phoron
3 cloves of garlic, minced
1 tablespoon of grated fresh ginger
3 - 4 fresh chilies, finely chopped
1 tablespoon of ground cumin
1/4 teaspoon of cayenne
1/2 teaspoon of ground coriander
1 teaspoon of salt
1 teaspoon of freshly ground black pepper
juice from one small lemon
1/4 cup of chopped fresh parsley or coriander


Boil or steam the potatoes until they are almost tender.

In a large frying pan, heat the oil over medium heat. Stir and fry the panch phora until it is fragrant. Add the garlic, ginger, chillies and ground spices to the pan and cook, stirring, for about 1 minute. Using a slotted spoon, transfer the contents of the pan to a small bowl and set aside.

Next add the potatoes to the pan, adding more oil if necessary to prevent sticking, and gently fry the potatoes until they are golden brown and crisp - about 10 - 15 minutes. To finish off, add the spice mixture to the cooked potatoes, along with the lemon juice and salt and pepper. Just before serving, sprinkle with fresh parsley or coriander. Serves 4 - 6 people.

Moist chocolate cake


Before the cake, some info: many of you have been asking me about my vacation – thanks, guys!
I went to Paris, Berlin, Rome and London and it was fantastic. Although Rome was incredibly beautiful, the city I liked the most was Berlin. The people are warm, the food was delicious. I would certainly come back one day!

If you are interested in taking a look at my “adventures in Europe”, some of

Tuesday, October 16, 2007

Whole Wheat Olive Oil Biscuits

I paid a visit to my Dad this past weekend, and as usual, I took advantage of the opportunity to transform some food in his spacious and cook-friendly kitchen. It was a collaborative effort on this occasion, with Dad providing the chili and me, a spicy Indian potato dish, along with some quick and easy biscuits. Though they are filling and made with whole wheat flour, these biscuits are surprising delicate, with a melt in your mouth quality that is not to be resisted. Serve warm with a pat of butter.
Whole Wheat Olive Oil Biscuits

1 cup of unbleached white flour
1 cup of whole wheat flour
1 tablespoon of baking powder
1/4 teaspoon of baking soda
pinch of salt
1/4 cup of butter, chilled
1/4 cup of olive oil
3/4 cup of milk or yogurt
handful of raisins, currants, cranberries, cherries, chopped nuts, fresh or dried berries or any other additions you would like


Grease a large baking sheet with butter or oil.

In a large bowl, combine the flour, baking powder, baking soda and salt. Add the oil and butter and cut the butter into the flour mixture with a pastry cutter or a knife and fork until only small pieces are visible. Make a well in the center of the mixture.

Add the milk or yogurt, and stir gently until the dough holds together. If you are adding any fruit, raisins, berries or other additions, stir them in with the milk. Gently shape the dough into 2 inch rounds approximately 1 inch thick and transfer to the baking sheet. Bake in a preheated over for 15 minutes, or until golden brown. Makes 8 - 10 biscuits.

Monday, October 15, 2007

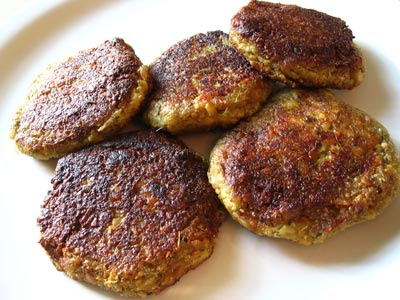
Tempeh Cutlets

As I've noted before, tempeh is a traditional Indonesian fermented soybean product that's not only an excellent source of protein and vitamin B12 for vegetarians but also a very malleable, versatile and easy-to-use staple for cooking. But as with most soy products made in the West, the product you see in stores is not always made in processes that deliver the benefits that they're supposed to. In the case of tempeh, modern hygienic standards actually inhibit the growth of beneficial cultures that otherwise remove through fermentation the enzyme inhibitors and phytates that block the absorption of essential minerals and proteins in soybeans. Make sure to find tempeh that's been properly innoculated with Rhizopus culture — if you live in Ontario, I recommend the tempeh products from the Noble Bean.

I had just bought a package of tempeh the other week when I happened to come across a recipe for tempeh cutlets at Dhivya Karthik's Culinary Bazaar that looked too tempting to ignore. And I'm glad I didn't. After I added a few coriander and fennel seeds to the recipe and brushed the cutlets with a little tamari sauce to boot, I found them to be absolutely delicious and a great way to serve up a light lunch or supper. Although very tasty just on their own, they'd also go great with your favourite sauce or chutney, as Dhivya advises, so I made up a simple Roasted Toor Dal and Coconut Chutney to pour over them. Mmm…

So here's Dhivya's recipe with a few little modifications of my own:
Tempeh cutlets

1 lemongrass stalk, outer leaves removed, and chopped
2 garlic cloves, chopped
3 scallions, chopped
1 medium onion, chopped
2 jalapeño peppers, chopped
1-inch piece fresh ginger, chopped
1 tablespoon fresh coriander leaves, chopped
1/2 teaspoon coriander seeds
1/4 teaspoon fennel seeds
juice of 1 small lemon
12 ounces tempeh, crumbled
3 tablespoons all-purpose flour
1 teaspoon sugar
3/4 teaspoon sea salt
fresh ground black pepper
tamari sauce
olive oil


In a food processor or blender, grind the lemongrass, garlic, scallions, onion, jalapeños, ginger, coriander leaves and seeds, fennel seeds, and lemon juice into a coarse paste. Add the tempeh and grate until combined.

Transfer the mixture to a large bowl and stir in the flour, sugar, salt and pepper.

Pour ¼-inch of olive oil into a large cast-iron frying pan and heat over medium heat. Meanwhile, rub a little oil into your hands and shape the tempeh mixture into patties. When the oil is hot, place the patties in the pan and fry until the bottoms are golden-brown, about 6 - 8 minutes. Before turning, brush a little tamari sauce on each patty and wait a minute. Fry the other side, brushing a little more tamari sauce on each patty, for 2 - 3 minutes.

Remove to a plate and drain the excess oil with paper towel.

Serve hot. Makes about 10 3-inch hamburger-sized patties.

Sunday, October 14, 2007

Roasted Toor Dal & Coconut Chutney

Coconut or dal chutneys are popular accompaniments to rice dishes in the southern regions of India, and this very simple toovar nariyal chatni slightly adapted from Yamuna Devi's Lord Krishna's Cuisine has both for the best of both worlds. Very fragrant with a mellow aroma of roasted nuts, you'll want to taste it even before it's finished. Toor dal, also seen as toovar dal, is easily available at any Indian grocery store but ordinary yellow split peas can be substituted for just as delicious a chutney.
Roasted toor dal & coconut chutney

1 teaspoon sesame oil
1/2 teaspoon black mustard seeds
1/4 cup toor dal
1/2 cup unsweetened shredded dried coconut
2 jalapeño peppers, chopped
1 teaspoon sea salt
1/4 teaspoon asafoetida
1/2 cup yogurt
1/2 cup warm water


Heat the sesame oil in a small frying pan over medium heat. When hot, toss in the black mustard seeds and fry until they begin to sputter. Add the toor dal and fry, stirring often, for a minute or two until the color darkens a shade or two. Add the coconut and continue to fry for another 2 minutes until the mixture darkens and becomes very fragrant. Remove from heat.

Place the mixture in a food processor and pulse repeatedly to chop the dal and process into almost a moist powder. Add the remaining ingredients and blend until smooth or slightly chunky, as desired.

Transfer to a bowl, cover and set aside for at least 2 hours to thicken before serving. Serve at room temperature, ladled over hot rice if desired. Makes about a cup and a half of chutney that can be refrigerated, covered, for 1 - 2 days.

Saturday, October 13, 2007

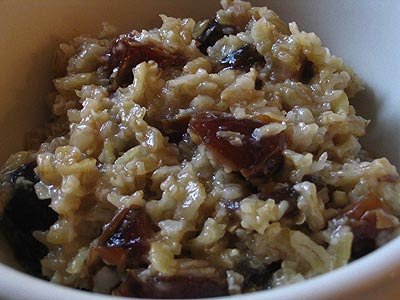
Staple Corner: Kamut Porridge and Chopped Dates

It's no secret these days that whole grains are essential to a proper and well-balanced diet, but it's important not to get pulled in by the whole grains marketing of commercially packaged foods like breads, granolas, cereals and snacks — as I've noted before, the quality and processing of grains in mass production methods negates most of their benefits.

Fortunately, making a top quality whole grain breakfast porridge is almost as fast and easy as toasting a bagel or pouring a bowl of boxed cereal, and a lot tastier and more economical. Oat or wheat porridges are most common in this part of the world, but almost any grain can be made into porridge, including rice, quinoa, millet and rye.

One of my favourite grains for breakfast porridge is kamut, an ancient type of wheat believed to have originated in ancient Egypt and only recently cultivated again in modern times after the discovery of a few seeds in the tomb of King Tutankhamen. Rolled kamut flakes can now be found in most health food stores. Compared to most wheat, kamut is richer in protein, magnesium, zinc, B vitamins and vitamin E, and unsaturated fatty acids, and is more easily digestible and generally tolerated by people with gluten sensitivities.

Kamut porridge is a great way to start the day with a high energy food, and its natural nutty flavour is very appealing even by itself. Like any grain porridge, it goes well with any kind of nut, seed or fruit, but I find that the flavour of kamut goes especially nicely with the sweetness of dried dates, which also provides your breakfast with a great source of fibre and potassium.
Kamut porridge and chopped dates

1 cup rolled kamut flakes
2 cups water
1/8 teaspoon sea salt
dash of vanilla
1 cup dates, pitted and chopped


Soak kamut flakes in water overnight in a small saucepan. In the morning, stir in the salt and bring to a slow boil over medium-high heat. Reduce the heat to medium-low and continue to cook, stirring frequently, for about 10 minutes or until most of the water is absorbed.

Stir in the vanilla and chopped dates. As always, whole grains should always be eaten with good fatty dairy products to provide the catalyst for mineral absorption, so serve with a pat of butter or a dollop of cream, and a little brown sugar or maple syrup if desired. Serves two.

Thursday, October 11, 2007

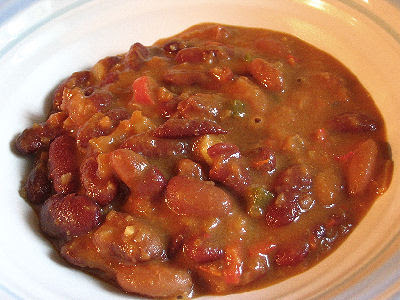
Nigerian Red Kidney Bean Stew

I was wondering what to make the other day for dinner and I came across a recipe for Nigerian Red Kidney Bean Stew with a Peanut Sauce. This stew reminded me of the Nigerian Baked Beans I posted here shortly after Lisa's Kitchen went live in the blogosphere. Both recipes include peanut butter and both are adapted from Madhur Jaffrey's World Vegetarian, a cookbook that I have been exploring more and more of late as I look for new creations to try and share.


The original recipe calls for smooth peanut butter, but like I do with the baked beans, I use natural crunchy peanut butter. If desired, add a cup of corn when you add the tomato mixture to the pot of beans. Serve with rice and a vegetable dish.
Nigerian Red Kidney Bean Stew with a Peanut Sauce

1 1/2 cups of dried red kidney beans or a combination of dried kidney beans and pinto beans
3 tablespoons of sesame oil
1 medium onion, finely chopped
2 garlic cloves, finely chopped
3 jalapeno peppers, finely diced
1 - 2 red cayenne peppers, finely diced
2 teaspoons of ground cumin
1 cup of tomato sauce
1/2 teaspoon of cayenne
juice from one small lemon
3 tablespoons of peanut butter
2 teaspoons of sea salt


Soak the beans in water overnight. Drain the soaking liquid, and cook the beans in a large pot in 5 cups of water for about an hour or until the beans are tender. Do not drain.

Heat the oil in a medium-sized pot over medium heat. Add the onion, garlic and peppers. Stir and fry for about 5 minutes. Add the cumin, stir, then add the tomato sauce, cayenne, lemon juice and 1/2 cup of water. Stir to blend, bring to a simmer and then turn the heat to low and simmer gently, stirring occasionally, for 15 minutes.

While the tomato mixture is simmering, put the peanut butter in a small bowl. Slowly add about 1/2 cup of the cooking liquid from the beans, mixing as you add the water. Stir the peanut butter mixture into the cooked beans, along with the salt.

When the tomato mixture is finished cooking, pour it into the cooked beans and stir. Bring to simmer, cover, and gently cook for 10 - 15 minutes.

I'm back! With really nice brownies


I’m back from my trip and all I can say is that I’ve had the time of my life. Something that I had wanted to do forever, a dream come true.

I want to thank you all for your best wishes and your words - it's fantastic to know I have so many great friends!

Now I’m back home and back at work too, but haven’t cooked anything different. I haven’t baked either. Luckily, I made these brownies a few

Wednesday, October 10, 2007

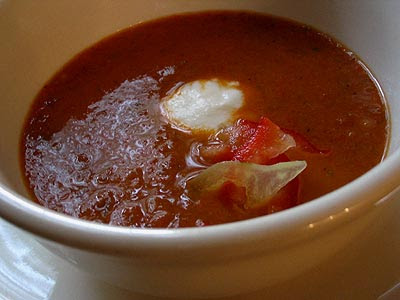
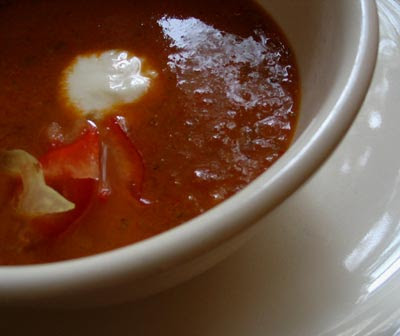
Red Pepper and Tomato Soup

In addition to having some tomatoes on hand from my backyard garden, I was kindly presented with a bag of local peppers the other day when I went to bottle a batch of red wine at Danny's Wine and Beer Supplies. Not wanting to let such delicious produce go to waste, I found a recipe for an easy and very tasty Red Pepper and Tomato Soup in James McNair's Soups. As usual, I've modified the recipe somewhat to suit my spicy tastes. If you don't have vegetable stock on hand, increase the amount of salt and add a few teaspoons of celery seed.

I've submitted this recipe to Andrea's Recipes, who will be hosting a Grow Your Own event featuring recipes using homegrown foods.
Red Pepper and Tomato Soup

1/4 cup of olive oil
2 cups of chopped red onion
4 cups of chopped red pepper
small handful of chili peppers
1 large clove of garlic
2 cups of seeded tomatoes, chopped
1 tablespoon of fresh rosemary
1 teaspoon of dried marjoram
1 teaspoon of dried thyme
2 bay leaves, crushed
4 cups of vegetable stock or water
a few teaspoons of fresh lemon juice
2 teaspoons of ground cumin
1 heaping teaspoon of ground coriander
1/2 teaspoon of cayenne
1 inch piece of ginger, minced
salt and freshly ground pepper to taste


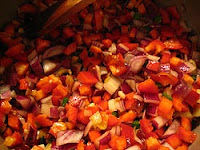
Heat the olive oil in a large soup pot over medium heat. When the oil is hot, add the onion, chopped peppers and garlic. Stir to coat with the oil. Reduce the heat to low, cover and cook, stirring occasionally, until the onion and pepper begins to soften and change color - about 20 minutes.

Next add the tomato, stock or water, lemon juice, herbs and bay leaves, cumin, coriander, cayenne, ginger and salt and pepper. Increase the heat to medium high and bring to a boil. Immediately reduce the heat to low and simmer, uncovered, for about 30 - 40 minutes.

Remove the soup from the heat and puree in a blender or use an electric hand blender. The soup can be served hot or cold. If serving hot, garnish with a bit of sliced pepper and a dollop of yogurt or sour cream.

Tuesday, October 9, 2007

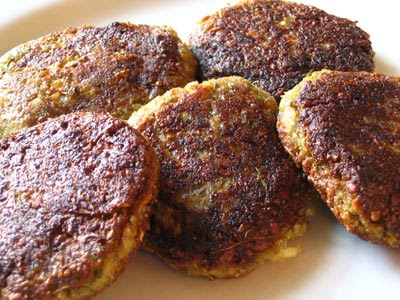
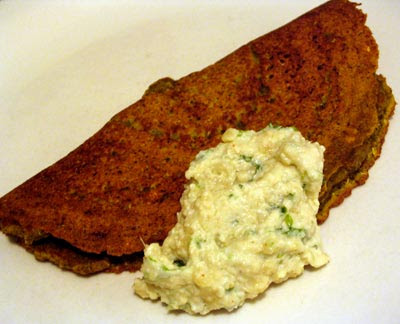
Savoury Mung Dal Pancakes

The thin, soft savoury bean pancakes known as cheela are a Gujarati delight, served with breakfast, lunch or dinner as breads for rolling and dipping in tasty chutneys or sauces. Although they can be made with besan, or chickpea flour, the genuine articles are made with soaked split mung beans, or moong dal, which give the cheela a hearty consistency as well as a beautiful gold-green-red colour when fried.

The basic ingredients and process are very much the same wherever you look, but these masala cheela adapted from Yamuna Devi's marvelous Lord Krishna's Cuisine are especially fragrant and savoury with the addition of coriander and fennel seeds. I also took Yamuna Devi's suggestion to serve them with cashew chutney for dipping — it was such a perfect combination that people couldn't stop helping themselves to it, even though they're quite filling.

Although the preparation is very simple and takes very little time, the pancakes are fried one at a time in a fairly time-consuming process. Be prepared to dish them up to your family or guests as they come out of the pan and wait until you're done to eat yourself!
Savoury mung dal pancakes

1 cup split mung beans without skins
1/2 cup yogurt
2 tablespoons coriander seeds
1 tablespoon fennel seeds
1 teaspoon sea salt
1/2 teaspoon asafoetida
1/4 teaspoon turmeric
1/3 cup water
4 dried red chillies, or to taste, crushed
1/2 cup melted ghee or olive oil


Rinse the dal thoroughly under cold running water, then place in a bowl and cover with water so that there are several inches of water above the dal. Soak for at least 3 hours or overnight, then drain and discard the soaking water.

Put the soaked dal in a food processor or blender and blend for a couple of minutes, stopping now and then to push the dal down with a spatula. Add the yogurt, coriander and fennel seeds, salt, asafoetida and turmeric and blend for another minute. If necessary, add enough water to make the batter thickish, like a lightly whipped cream. Transfer the mixture to a bowl and stir in the crushed chillies.

Preheat a 10-inch frying pan or cast-iron pan over medium-low heat for 2-3 minutes. Sprinkle a few drops of water on the pan to test the temperature — if it is just right, the drops will dance and sputter before vanishing. If the drops vanish right away, turn down the temperature slightly, or if the drops just sit on the surface before boiling, turn up the temperature slightly. Brush the surface with a light film of ghee or olive oil.

Scoop ¼ cup of the batter and place on the middle of the pan. Wait a few seconds, then place the bottom of a ladle or large spoon in the centre of the batter and spread it outwards in a continuous spiral, pressing lightly, until you have a thin round or oval pancake about 8 inches in diameter. Cook for 1 minute, then drizzle a teaspoon of the ghee or olive oil over the surface and around the edges of the pancake.

Cover the pan and cook for 3-4 minutes until small holes appear on the top of the batter and the bottom is golden to reddish-brown. Loosen the edges with a spatula and turn the pancake over. Fry, uncovered, for another minute or so, then flip over once again, fold the pancake in half and slip it out of the pan on to a warming plate or into an oven preheated to 150° while you repeat the process. Repeat the water sprinkling to test the temperature and brush the pan with more ghee or oil before adding each ¼ cup of batter. Makes 9 or 10 pancakes.

Serve hot, or store wrapped in aluminum foil and reheated in a 350° oven.

Monday, October 8, 2007

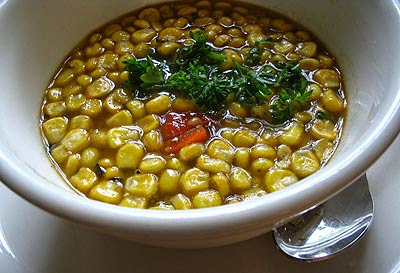
Corn and Roast Pepper Soup

As Chef Jules continues to present a tasty selection of recipes, my list of dishes to try gets longer every week. This time around I tried his Corn and Roasted Red Pepper Soup. I've made a few variations, but essentially followed his recipe. This soup would make a satisfying addition to any menu, no matter the season. It's light enough to be served in the summer, and spicy and warm enough to ease the winter chills.

If you don't have vegetable stock on hand, increase the amount of salt and add a few teaspoons of celery seed. Instructions, complete with pictures, on how to roast peppers can be found here.
Corn and Roasted Red Pepper Soup

2 tablespoons of olive oil
1 large onion, finely chopped
4 - 6 cloves of garlic, minced
1 heaping tablespoon of ground cumin
1/2 teaspoon of cayenne pepper
1 teaspoon of ground coriander
1 tablespoon of chopped fresh rosemary leaves
1 bay leaf (whole, or crushed)
1 teaspoon of sea salt
1 1/2 teaspoons of cracked black peppercorns
6 cups of vegetable stock
1 dried ancho or guajillo chile pepper
1 cup of boiling water
3 jalapeno peppers, seeded and coarsely chopped
1 small tomato, chopped
4 - 5 cups of corn kernels
2 red bell peppers, roasted and cut into 1/2 cubes
1/2 cup of whipping cream or yogurt
finely chopped cilantro or parsley for garnishing


Soak the dried chile pepper for 30 minutes in the boiling water. Drain, discarding the soaking liquid. Remove the stem and coarsely chop the chili. Set aside.

In a large soup pot, heat the oil over medium heat until hot. Add the onion and cook, stirring occasionally, until the onion is soft - about 3 - 5 minutes. Add the garlic, cumin, cayenne, coriander, rosemary, bay leaf, salt and pepper and cook and stir for about 1 minute. Add the stock or water, stir to combine and bring to a low boil. Cover the soup partially with the lid and gently simmer until the flavours are blended - about 15 - 20 minutes.

In a blender, puree the chopped dried and soaked chile pepper, the chopped jalapeno peppers, the tomato and about 1 cup of the stock from the soup pot. Add the mixture to the soup pot, along with the corn, roasted red pepper and cream or yogurt. Stir well to combine. Cover and cook on low heat until the corn is tender. If you like, you can puree a small portion of the soup for a creamier version. Garnish each serving with cilantro or parsley.

Yields approximately 6 - 8 servings.
I've submitted this recipe to Kalyn's Kitchen, who will soon be celebrating 2 years of Weekend Herb Blogging.

Friday, October 5, 2007

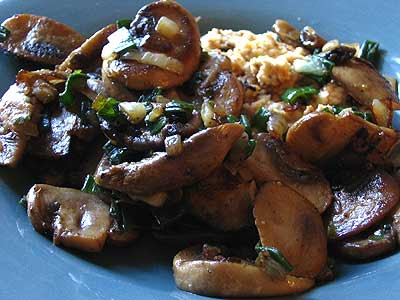
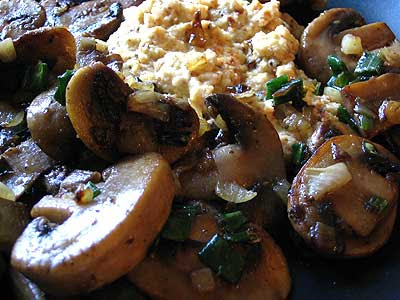
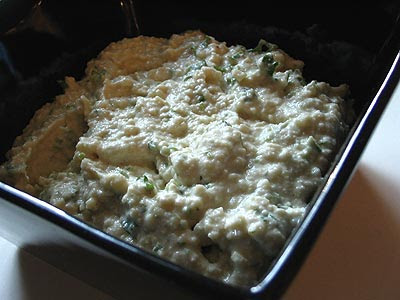
Scrambled Ricotta with Pan-Fried Mushrooms and Scallion

You may not have realized that you can scramble or bake ricotta cheese just like eggs, but if you're tired of eggs and still looking for protein in your breakfast, try this very simple, smooth and slightly tangy ricotta scramble for a change. Any fried vegetables would go well with the ricotta, a very flexible and versatile cheese, but I like to top it off with mushrooms fried using my own special method. The secret of cooking beautiful, crisp but juicy mushrooms, I've discovered, is to fry them in olive oil over very high heat — this seals in the juicy flavours inside a golden reddish-brown exterior that's almost as good to look at as to eat. Scallions, green chilies, salt and pepper finish off the earthy and slightly spicy flavours.
Scrambled ricotta with pan-fried mushrooms and scallion

4 tablespoons olive oil
8 oz. white mushrooms, sliced
1 scallion, both white and green parts, chopped
3 small green chilies, or to taste, finely chopped
1 cup ricotta cheese, whole fat
1 teaspoon sea salt
fresh ground black pepper


Set an 8-inch frying pan over high heat for a minute. Add 2 tablespoons of the olive oil to the middle of the pan, wait 10 seconds, then swirl around to coat the pan. Let the oil heat for another 30 seconds.

Toss in the mushrooms and stir fry for about 6-8 minutes until the sides turn to a deep reddish-brown. Sprinkle in 1/2 teaspoon of the salt and some fresh ground black pepper over the mushrooms and stir. Pour in another tablespoon of olive oil, then add the white parts of the scallions and the chilies and continue to stir fry for another couple of minutes until the scallions brown at the edges. Finally, stir in the green parts of the scallions for just a minute until they are softened. Remove from the pan and set aside.

Turn the heat on the stove down to medium and wipe down the pan with a damp cloth. Return the pan to the heat and, as before, let the pan warm up for another minute before adding the last tablespoon of olive oil to the middle and waiting 10 seconds before swirling around.

When the oil is hot, spoon in the ricotta cheese (watch out for splattering) and spread evenly over the pan in a thin layer. Let the ricotta cook undisturbed for 5 minutes, during which time the cheese will bubble and brown at the edges.

Sprinkle the remaining 1/2 teaspoon of salt over the ricotta and turn the mixture over gently with a wooden spoon, trying to get all the uncooked top of the cheese on the bottom in contact with the frying pan. Let the cheese cook again for another 5 minutes without stirring.

When the cheese is cooked, give it gentle scramble with the spoon and remove straight from the heat on to plates. Pour the mushroom mixture on top and grind over some black pepper. Serves two.

Thursday, October 4, 2007

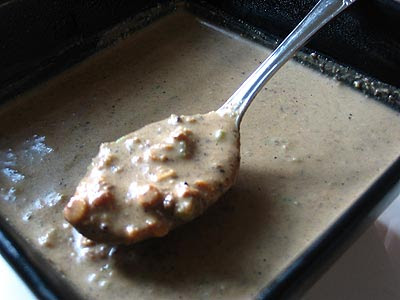
Cashew Chutney

This Keralan cashew chutney, or kaju chatni, is one of the most delicious accompaniments I've ever come across for vegetables or Indian savoury pastries, and a must-try for cashew lovers. Adapted from Yamuna Devi's incomparable Indian cookbook, Lord Krishna's Cuisine, which also suggests that it makes a wonderful salad dressing when thinned, it only takes ten minutes at most to prepare and keeps well for several days. Make sure to use only fresh, raw cashews.
Cashew chutney

1 cup raw cashews, bits or halves
½-inch piece of ginger, sliced
5 hot green chillies, chopped with the seeds
1 teaspoon sea salt
small dash cayenne powder
¼ teaspoon lemon juice
1/3 cup water
2 tablespoons fresh coriander, chopped


Combine the cashews, ginger, chillies, salt, cayenne and lemon juice in a food processor or blender with a ¼ cup of the water and blend until smooth, adding more of the water as necessary to produce a smooth purée. Transfer to a bowl and stir in the fresh coriander.

Serve fresh or refrigerate covered up to 3 days. If refrigerated, add a little more water when serving to thin the chutney as it tends to thicken when sitting.

Tuesday, October 2, 2007

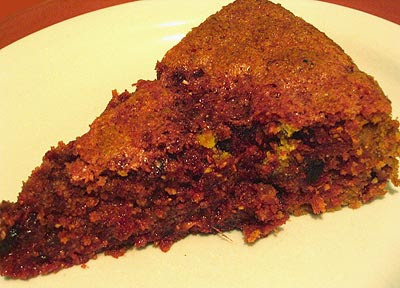
Beetroot Cake


It seems I have developed a particular fondness for beets this Fall after making Orange and Beet Soup a few weeks back. Since then, beets have been a regular feature in my fridge. This is sure to please my friend Mike, who has been asking me to make Borscht for a long time now. I've just recently come across the perfect recipe and I will be presenting a Creamy Beet Borscht soon. Expect a dinner invite soon Mike!

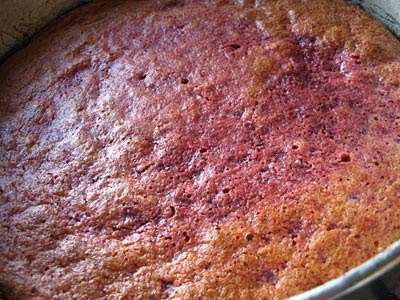
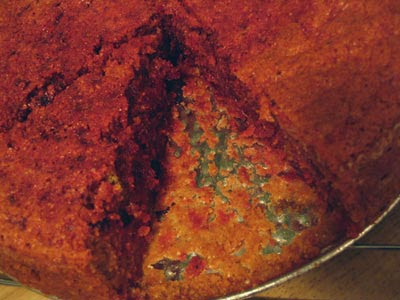
I was originally going to make another beet soup with the latest batch, until I came across this unusual recipe for Beetroot Cake over at Baked. I wasn't sure what to expect, but after a few bites of this almost savory tasting spongy cake, I was hooked, as were my guests. I can honestly say that this was one of the most pleasurable cake eating experiences I have ever had. Honey is used as a sweetener rather than sugar, so it's not too sweet, instead relying on the flavour provided by the beets and spices. The addition of cornmeal also gives the cake a slight crunch. The middle of the cake is almost pudding like, while the edges of the cake have a more traditionally cakey texture. It was unanimously agreed that it should be enjoyed from the inside out.

You can use yellow or red beets for this cake. I choose the red beets because I don't recall ever enjoying a red cake before. I decided not to ice the cake but a cream cheese based icing would be nice or you can use the topping suggested in the original recipe.
Beetroot Cake

Cake:

1 lb of raw beets
1 inch piece of ginger, finely chopped
3 large eggs, separated
2/3 cup of honey
3/4 cup of live oil
2 teaspoons of vanilla
2 heaping teaspoons of baking powder
2/3 cup of cornmeal
zest and juice from one orange
pinch of salt
1/4 teaspoon of cinnamon
pinch of ground cloves
1 1/4 cup of unbleached soft white flour


Topping (optional):

7 oz. creme fraiche
1 wineglass of vin santo, Marsala or sherry
2 heaping tablespoons of sugar


Cake:

Boil the beets until they are soft - about 1 - 1 1/2 hours. Remove them from the pot, and allow them to cool for a bit. Cut off the coarse ends and rub the skins off. Transfer to a bowl and mash until smooth.

Grease and flour a 9 or 10 inch springform pan.

In a large bowl, combine the mashed beet, ginger, egg yolks, honey, vanilla and olive oil. Whisk together until well combined.

Add the baking powder, cornmeal, orange juice and orange zest, along with the salt, spices and flour. Stir until just combined.

In a snall bowl, beat the egg whites until stiff peaks form and then fold them into the cake mixture.

Transfer the mixture into the prepared pan. Bake in a preheated 350 degree oven for 35 - 45 minutes, or until a toothpick or cake tester inserted into the middle of the cake comes out clean. Cool before serving.

Topping:

Whisk together the creme fraiche, alcohol and add the sugar, along with some vanilla if desired.