Those of us who enjoy the thought, imagination and fine work that go into cooking will always find the appreciative words and expressions of family and friends as ample rewards for our efforts as the flavours of a dish that turns out right. But I think I can speak for most food bloggers when I say that we gain an extra pleasure when we find out that others are making use of and enjoying our ideas — one that lingers long after the memory of the tastes have faded. People have complimented me for my generosity in sharing recipes, but I can honestly say that I receive far more back from my readers than I give…
…which seems to be the very idea that
Zlamushka had in mind when she started hosting "
Tried and Tasted," a monthly event for people to share their recreations of recipes found at some of the best food blogs around — a celebration of what she calls the divine feeling of "having your recipes lead somebody else’s kitchen."
So I'm not alone in thinking that. Nor, would it seem, am I alone in thinking that
What's For Lunch, Honey is one of the finest food blogs going, now that Zlamushka has asked her readers to submit a recreation of one of
Meeta's recipes for July's
Tried and Tasted. Meeta's fabulous recipes and gorgeous photographs — and plenty of desserts! — always make her blog a visual feast by itself, but the wonderful stories she so beautifully tells in each of her entries set her apart from the crowd almost as much as the food. She is a lovely lady who is also an amazing cook.
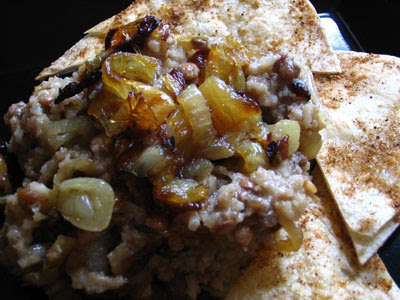
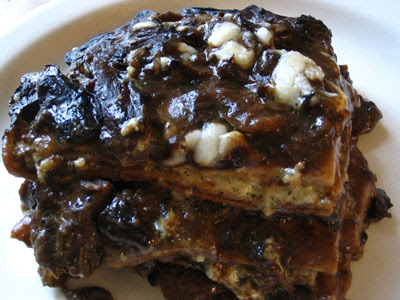
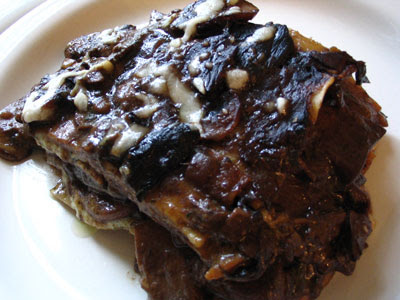
As it happened, I had already been planning to make Meeta's
ricotta pesto and mushroom lasagne when Zlamushka's invitation came out. In fact, I had even emailed Meeta to make sure that she really had meant "100 grams of dried porcini mushrooms" in the recipe instead of 10, to which she replied in polite and friendly fashion that, yes, that would in fact be 100 grams of dried mushrooms in addition to 950 grams of fresh mushrooms … !! Well, can kinder words ever be spoken to a mushroom lover?
I ended up calling this the sixty-dollar lasagne, since dried mushrooms are apparently far more dear here than they must be in Germany, where Meeta lives. Still, it was a lot of food that went a long way, and I instantly forgot all my regrets about spending so much money as the aroma of cooked mushrooms drifted out of the oven. Somehow, the lasagne was more perfectly mushroom-y than mushrooms themselves, if that makes any sense. (To be truthful, I had probably added even more fresh mushrooms than Meeta called for in my general confusion between ounces and grams.) At the same time, the creamy tang of a heavenly ricotta basil pesto perfectly accented the rich earthy tones of the mushrooms.
This was truly an astonishing lasagne that will live in mushroom lore for years, at least in my household. As an indication of the quality that Meeta brings to each and every one of her recipes, I can imagine no better tribute than the satisfied smiles and mmmm's it brought to the lips of my guests. Meeta has their appreciation and mine, as well as a promise to come back for more ideas … like maybe one of her gorgeous
desserts … um …
chocolate caramel tart anyone?
Find the recipe for Meeta's ricotta pesto and mushroom lasagne
here.
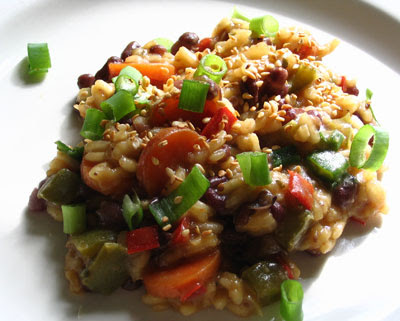
 These very simple and quick little eggs are elegant on the plate and taste just as wonderful. They would make a marvelous light lunch with a small green salad, but I must admit that I had them for breakfast the other day with toast and an orange.


 Print this recipe