As of today, Lisa's Kitchen is officially one year old. Thank you to all of my regular readers for your encouraging comments and insightful ideas. I've met some special people over the course of the past year due to my blogging efforts and for that, I'll remain forever grateful. I started this site on my mom's birthday, but sadly, my mom is no longer here to brighten the days of all those who were fortunate enough to appreciate and enjoy her food, kindness and unconditional love for her family. I'm thankful she at least got a brief glimpse of my efforts here as my mother was one of my earliest culinary influences.
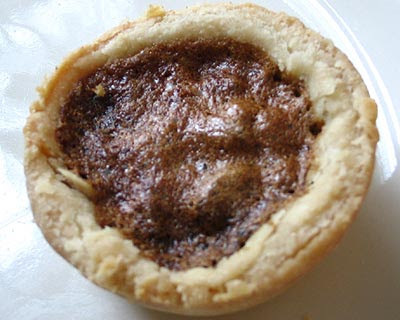
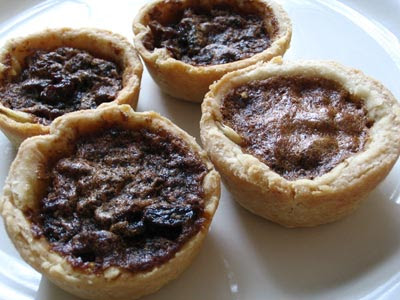
I can't think of a better way to remember my mom and celebrate one year of cooking from Lisa's Kitchen than by sharing my mom's best ever butter tart recipe. My mom was a master of pastry. Her pies and tarts always turned out perfectly. Though she was a good cook and excellent baker, her butter tarts are fondly remembered by all who tasted them as some of the best they ever had. The filling is gooey, but not runny, making it a perfect indulgence to enjoy without a fork. Store bought varieties of this classic Canadian treat are very pale in comparison.

I've had success in past with pastry, but I must admit, I still struggle with it. Take my first attempt at making these tarts for example. Though I understand that it is essential to use cold ingredients in order to produce a flaky, light tart shell, I was impatient to get baking and so did not chill the shortening long enough. I also overworked the dough and rolled it out too thin. The result was a rather tough, sticky pastry that tore when I transfered it to the tins. Not a good start, especially considering I had already prepared the filling. Thankfully for those unfortunate enough to be around when I'm making pastry, my once fierce temper has abated significantly. Instead of throwing the dough across the room, as I have been known to do, I merely uttered some oaths and punched the failed lump of waste before transferring the majority of it to the trash can. Then I had a cigarette before trying again.
They didn't work out quite as well as my mom's, but the filling tasted just as I had remembered it, with a slightly stronger vanilla taste because I doubled the amount called for in the recipe. Even the most classic recipes can sometimes be improved upon.
Usually I use butter for my pastry, but in the interest of documenting my mom's recipe, I've followed her version, provided here, which uses shortening instead. Feel free to substitute your own favored pastry recipe.
Mom's Classic Butter Tarts
To make the pastry:
2 cups of flour
1 teaspoon of salt
3/4 cup of shortening
5-7 tablespoons of ice water
Combine the salt and flour in a medium mixing bowl. Cut in the shortening with a pastry cutter until the mixture resembles coarse meal.
Add the water a bit at a time, mixing lightly with a fork, until the dough begins to hold together. Shape the dough into a firm ball with your hands. On a lightly floured board, roll the dough out until it is roughly 1/8" thick. Cut into 4" rounds, and transfer to muffin tins, pressing down gently.
To make the filling:
1 egg, beaten
1/3 cup of butter, softened
1 cup of brown sugar
2 tablespoons of milk
a generous 1/2 cup of raisins
1 - 2 teaspoons of vanilla
Mix together all of the ingredients in a medium bowl. Spoon the mixture evenly into the tart shells. Bake in a preheated 450 degree oven for 8 minutes. Reduce the heat to 350 degrees and bake for another 15 - 20 minutes longer, or until the filling is set and the pastry is lightly browned.
Makes 12.

 The votes are in and the winner of the March edition of No Croutons Required is Helen of Food Stories who made this incredible Smoky, Sweet & Spicy Red Pepper Soup with Feta and Mint. I can't wait to try this one. Congratulations Helen! This is certainly one fine looking soup.
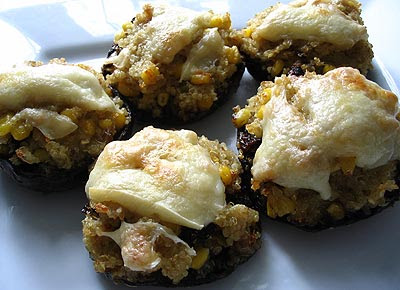
 I will be hosting the April edition of No Croutons Required, a monthly vegetarian soup and salad challenge started by Holler of Tinned Tomatoes and myself. The first two themes have centered around soups. In anticipation of Spring, this month we would like participants to submit a soup or a salad or anything in between featuring mushrooms of any variety. Regular readers of our respective blogs will know that Holler and I can never eat enough mushrooms. Though mushrooms are probably the meatiest of vegetarian fare, we do ask that you stick to the vegetarian theme, meaning no meat, poultry or seafood. We are excited to see what everyone will come up with this month and look forward to some new mushroom dishes to grace our tables. Entries are due by April 20th. For a recap of the submission guidelines, please go here.


 Print this recipe